
In this tutorial, we will create an offline To-Do App with React. We will use browser local storage to save the tasks, which will keep the tasks even after we close the browser. In the end, we will host this application on Github pages.
Pre-requisites
- Nodejs
- Code editor (I am using VS Code)
- Github Account
React Application
We are going to use create-react-app as our base application.
npx create-react-app my-task-list
cd my-task-list
If you’ve previously installed
create-react-appglobally vianpm install -g create-react-app, we recommend you uninstall the package usingnpm uninstall -g create-react-appto ensure thatnpxalways uses the latest version.
Install semantic-ui-react
For this project, we are using semantic-ui css. Using the only css is a bit headache where you have to configure each element in the web page. To make this quick and less hassle, we have semantic-ui-react library. Semantic UI React provides the react component which has already configured semantic-ui css. In short, you don’t have to align a component or adjust the margin.
Semantic UI React is the official React integration for Semantic UI.
Open the terminal inside the my-task-list project and run the below command.
npm install semantic-ui-reactindex.html
Open the index.html from the public folder and update the title.
<title>My task list</title>We also have to add the cdn of semantic-ui here. Paste the cdn in the head tag.
 <link
      rel="stylesheet"
      href="//cdn.jsdelivr.net/npm/[email protected]/dist/semantic.min.css"
    />
You should always use the latest cdn. You can check the latest version here.
My-Task-List component
Create a new folder component inside the src. Inside the component, create a new folder My-Task-List. Create 3 files inside it, My-Task-List.jsx, my-task-list.css and index.js.
Directory Structure
|- src
    |- component
        |- My-Task-List
             |- My-Task-List.jsx
             |- my-task-list.css
            |- index.js
My-Task-List.jsx
In this file, we are going to define our my-task-list component.
For storage, we are using the browser’s local storage.
Browser Local Storage
This local storage stores a key-value pair. The key and value both are strings.
While saving we have to convert the object into a string and while working on it we have to convert the string into an object.
To access the local storage we will use the localStorage object.localStorage has given to 2 methods to set and get the item.
- setItem: To save the
key-valuein the local storage.
localStorage.setItem(key, value);- getItem: Get the
valueby itskeyfrom the local storage.
localStorage.getItem(key)Open the My-Task-List.jsx paste the below code.
import React, { Component } from "react";
import { Card, Header, Form, Input, Icon } from "semantic-ui-react";
import "./my-task-list.css";

class MyTaskList extends Component {
  constructor(props) {
    super(props);

    this.state = {
      task: "",
      tasklist: []
    };
  }

  // on load get the task list
  componentDidMount = () => {
    this.getTasks();
  };

  onChange = event => {
    this.setState({
      [event.target.name]: event.target.value
    });
  };

  // add task to the list
  onSubmit = () => {
    // check is task is empty string
    if (this.state.task) {
      // get the task list from the local storage
      let tasklist = JSON.parse(localStorage.getItem("tasklist"));

      // task list is null means empty
      // create an empty list
      if (tasklist == null) {
        tasklist = [];
      }

      // create task object
      // default status is false
      let task = {
        task: `? ${this.state.task}`,
        status: false
      };

      // add the task to the task list
      tasklist.push(task);

      // save the task list in the local storage
      localStorage.setItem("tasklist", JSON.stringify(tasklist));

      // clear the form
      this.setState({ task: "" });

      // refresh the tasks
      this.getTasks();
    }
  };

  // get all the tasks
  getTasks = () => {
    // get the task list from the local storage
    let tasklist = JSON.parse(localStorage.getItem("tasklist"));

    // check if task list is empty
    if (tasklist) {
      // sort all the tasks on the basis of status
      // completed task will move down
      tasklist = tasklist.sort((a, b) => {
        if (a.status) {
          return 1;
        } else if (b.status) {
          return -1;
        }
        return 0;
      });

      // save the task list in the local storage
      localStorage.setItem("tasklist", JSON.stringify(tasklist));

      // set the tasklist to the state
      this.setState({
        // default color
        // Incomplete: yellow
        // complete: green
        tasklist: tasklist.map((item, index) => {
          let color = "yellow";
          let cardBackground = { background: "white" };
          let taskComplete = { textDecoration: "none" };

          if (item.status) {
            color = "green";
            cardBackground.background = "beige";
            taskComplete["textDecoration"] = "line-through";
          }
          return (
            <Card key={index} color={color} fluid style={cardBackground}>
              <Card.Content>
                <Card.Header textAlign="left" style={taskComplete}>
                  <div style={{ wordWrap: "break-word" }}>{item.task}</div>
                </Card.Header>

                <Card.Meta textAlign="right">
                  <Icon
                    link
                    name="check circle"
                    color="green"
                    onClick={() => this.updateTask(index)}
                  />
                  <span style={{ paddingRight: 10 }}>Done</span>
                  <Icon
                    link
                    name="undo"
                    color="yellow"
                    onClick={() => this.undoTask(index)}
                  />
                  <span style={{ paddingRight: 10 }}>Undo</span>
                  <Icon
                    link
                    name="delete"
                    color="red"
                    onClick={() => this.deleteTask(index)}
                  />
                  <span style={{ paddingRight: 10 }}>Delete</span>
                </Card.Meta>
              </Card.Content>
            </Card>
          );
        })
      });
    }
  };

  // update the task status to true
  updateTask = index => {
    // get the task list from the local storage
    let tasklist = JSON.parse(localStorage.getItem("tasklist"));
    // change status to true
    tasklist[index].status = true;
    // save the updated task list
    localStorage.setItem("tasklist", JSON.stringify(tasklist));
    // refresh the task list
    this.getTasks();
  };

  // undone the task status from true to false
  undoTask = index => {
    // get the task list from the local storage
    let tasklist = JSON.parse(localStorage.getItem("tasklist"));
    // change status to false
    tasklist[index].status = false;
    // save the updated task list
    localStorage.setItem("tasklist", JSON.stringify(tasklist));
    // refresh the task list
    this.getTasks();
  };

  // delete the task from the task list
  deleteTask = index => {
    // get the task list from the local storage
    let tasklist = JSON.parse(localStorage.getItem("tasklist"));
    // remove the task from the task list
    tasklist.splice(index, 1);
    // save the updated task list
    localStorage.setItem("tasklist", JSON.stringify(tasklist));
    // refresh the task list
    this.getTasks();
  };

  render() {
    return (
      <div>
        <div>
          <Header as="h1">
            <div className="app-header">? My Task List</div>{" "}
          </Header>
        </div>
        <div className="app-form">
          <Form onSubmit={this.onSubmit}>
            <Input
              type="text"
              name="task"
              onChange={this.onChange}
              value={this.state.task}
              fluid
              placeholder="task..."
            />
          </Form>
        </div>
        <div>
          <Card.Group>{this.state.tasklist}</Card.Group>
        </div>
      </div>
    );
  }
}

export default MyTaskList;
The key to the tasks is tasklist.
A quick explanation of the code.
- For the view we are using Card, Header, Form, Input, Icon react components from the
semantic-ui-react. Go to the links to learn more. - getTasks: This function will get the tasks from the local storage and create the task list using Card component. Each task has 3 actions, Done, Undo, and Delete.
- onSubmit: This function will save the task in the local storage.
- updateTask: This function will turn the task status to true in the local storage. It means the task is complete. This function will trigger on click of
Done. - undoTask: This function will turn the task status to false in the local storage. It means the task is incomplete. This function will trigger on click of
Undo. - deleteTask: This function will delete/remove the task from the local storage. This function will trigger on click of
Delete.
my-task-list.css
Open the my-task-list.css and paste the below code. Even though we are using the semantic-ui css, we can still make the custom changes.
.app-header {
  margin-bottom: 20px;
  margin-top: 30px;
}

.app-form {
  margin-bottom: 20px;
}
index.js
This index.js will export the MyTaskList component.
import MyTaskList from "./My-Task-List";

export default MyTaskList;
The MyTaskList component is complete. Let’s render it in App.js.
App.js
Open the App.js and update the code.
import React from "react";
import "./App.css";
import MyTaskList from "./components/My-Task-List";

function App() {
  return (
    <div>
      <MyTaskList></MyTaskList>
    </div>
  );
}

export default App;
App.css
Update the App.css.
body {
  width: 90%;
  margin-left: 20px;
}
Playtime ?
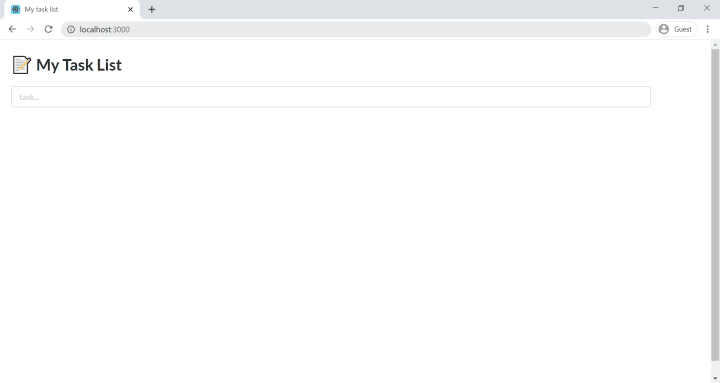
Open the terminal in the project directory and start the application.
npm startOpen the browser and go to http://localhost:3000/.
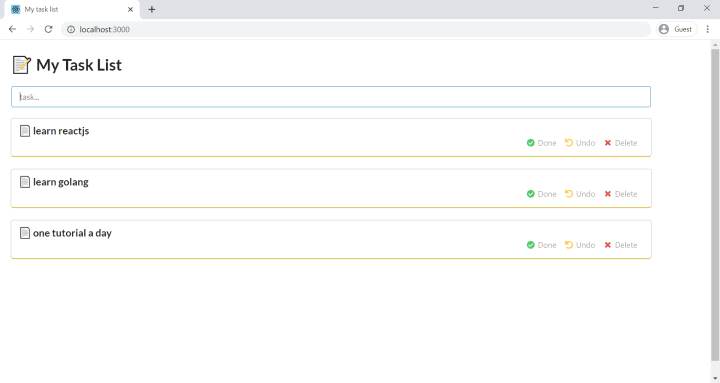
Create multiple tasks ✏️
- learn reactjs
- learn golang
- one tutorial a day
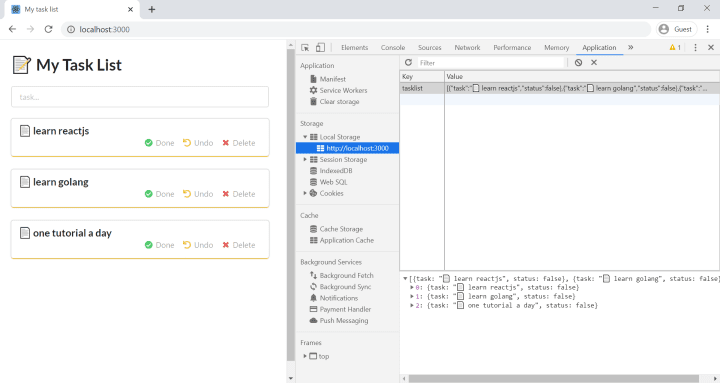
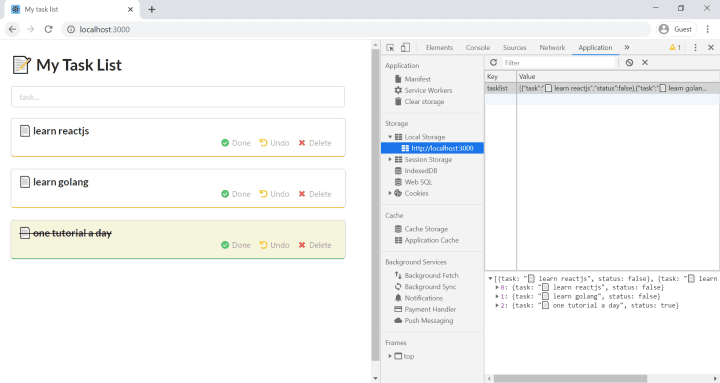
Check the local storage
On the Chrome Browser:
- Open Inspect.
Ctrl + Shift + I - Click on the Application tab
- On the left side, under the Storage section, click on Local Storage > http://localhost:3000
All the tasks are saved.
Complete a task ✔️
Click on Done Icon of any task. The completed task will move down.
In the local storage, you can notice that task status is changed.
Undo a task ↩️
Click on Undo Icon of the done task.

Delete a task ❌
Click on Delete Icon of any task. The task will delete/remove from the task list.

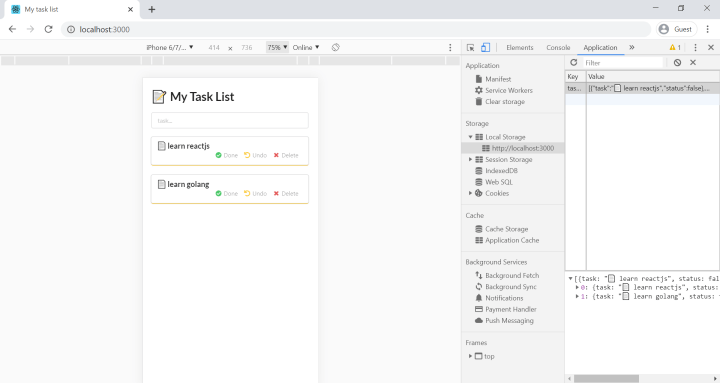
Mobile View
The application is responsive. So, you can use it on mobile.
Host the application on the Github Pages
Github Pages is a static site hosting service. You can host your site on GitHub’s github.io domain or your custom domain. Learn more.
Add GitHub repository to the project
Log in to your GitHub account.
Create a new repository my-task-list.
Don’t initiate anything like readme or license. Create an empty repository, because we will push the existing project.
Open the terminal in the project directory and run the below command.
git remote add origin <Repository URL>

// For Example:
git remote add origin https://github.com/schadokar/my-task-list.git
Install the Github Package as dev-dependency
Open the terminal in the project.
npm install gh-pages --save-devUpdate the package.json
Open the package.json and update it.
- Add the homepage: Add the URL where your application is going to host.
Github Host your site on https://<YourUserName>.github.io/<Repo-Name>.
"homepage": "https://<YourUserName>.github.io/my-task-list"

// for example
"homepage": "https://schadokar.github.io/my-task-list"- Add deploy and predeploy scripts: In the
scriptsadddeployandpredeployscripts.
"predeploy": "npm run build",
"deploy": "gh-pages -d build"
The package.json will look like this.
{
  "homepage": "https://schadokar.github.io/my-task-list",
  "name": "my-task-list",
  "version": "0.1.0",
  "private": true,
  "dependencies": {
    "@testing-library/jest-dom": "^4.2.4",
    "@testing-library/react": "^9.4.1",
    "@testing-library/user-event": "^7.2.1",
    "react": "^16.13.0",
    "react-dom": "^16.13.0",
    "react-scripts": "3.4.0"
  },
  "scripts": {
    "predeploy": "npm run build",
    "deploy": "gh-pages -d build",
    "start": "react-scripts start",
    "build": "react-scripts build",
    "test": "react-scripts test",
    "eject": "react-scripts eject"
  },
  "eslintConfig": {
    "extends": "react-app"
  },
  "browserslist": {
    "production": [
      ">0.2%",
      "not dead",
      "not op_mini all"
    ],
    "development": [
      "last 1 chrome version",
      "last 1 firefox version",
      "last 1 safari version"
    ]
  },
  "devDependencies": {
    "gh-pages": "^2.2.0"
  }
}
Run the deploy
It will create a new branch on gh-pages and push it to the repository. By default, GitHub uses gh-pages branch to host.
npm run deployCommit the changes ?
Open the terminal in the project. Add, Commit and push the project to the github repository.
git add .

git commit -m "My task list project completed"

git push origin master
Hosting
Now, go to your GitHub my-task-list repository.
Click on Settings and scroll down to Github Pages.
In the Source, check if it is using gh-pages branch.
If it is not using it, change it to gh-pages branch.
Now, on Github Pages section you can see a success message.
Your site is published at https://.github.io/my-task-list/

Your site is now in action ?.
Go to https://<YourUserName>.github.io/my-task-list/ and start managing your tasks.
Conclusion
Congratulations! ? ?
You successfully created your task list application which is now hosted on Github Pages. Now, you can use this task list on your mobile also.
Make the changes using semantic-ui-react or using your css. Add new features and make it serve you.
Share with your friends and push those lazy fellows to quit procrastination. ?
The complete GitHub code is available here.