
In some of the previous posts, you built a React Native app using Firebase as the backend service provider for Email authentication and storing user's data upon successful signup.
Let's add another common yet useful and necessary feature in the current app structure: Forgot Password. This feature will require another screen in the current React Native app. To follow this tutorial, you can either go through the previous posts if you are a beginner to React Native world:
- How authenitcation works using react-navigation 4.x.x
- How to build and validate forms in React Native apps using Formik and Yup
- Handle different field types in React Native forms
- Use React Context API to build React Native, Expo and Firebase apps
Or you if you are comfortable in understanding React Native code, dive deep in source code or download it from the Github repo release here.
After downloading the source code, please navigate inside the project directory and install dependencies by running the command npm install or yarn install.
Table of Contents
- Requirements
- Add Forgot Password Screen
- Add a method to send a password reset email
- Create a Form
- Handle Password Reset
Requirements
To follow this tutorial, please make sure you the following libraries are installed on your local development environment and access to the services mentioned below.
- Nodejs (
>= 10.x.x) with npm/yarn installed - expo-cli (
>= 3.x.x) (previously known as create-react-native-app) - Firebase account, free tier will do
Add Forgot Password Screen
Let’s start with a basic screen and hook it up with current navigation flow such that an app user will be able to navigate to this new screen from the Login screen.
Create a new file screens/ForgotPassword.js with some dummy text.
import React, { Component } from 'react'
import { Text, View } from 'react-native'

class ForgotPassword extends Component {
  render() {
    return (
      <View style={{ flex: 1, justifyContent: 'center', alignItems: 'center' }}>
        <Text>Forgot Password Screen</Text>
      </View>
    )
  }
}

export default ForgotPassword
Open the AuthNavigation.js file and this new class component as below.
import { createStackNavigator } from 'react-navigation-stack'
import Login from '../screens/Login'
import Signup from '../screens/Signup'
import ForgotPassword from '../screens/ForgotPassword'

const AuthNavigation = createStackNavigator(
  {
    Login: { screen: Login },
    Signup: { screen: Signup },
    ForgotPassword: { screen: ForgotPassword }
  },
  {
    initialRouteName: 'Login',
    headerMode: 'none'
  }
)

export default AuthNavigation
Lastly, open Login.js file. Logically, this where a button to navigate to this new ForgotPassword component should exist. First, add the handler method goToForgotPassword inside the Login class component with other handler methods.
goToForgotPassword = () => this.props.navigation.navigate('ForgotPassword')
Passing the name of the route as the first parameter to navigation.navigate() is how you navigate from one screen to the other screen using react-navigation library. In this case, the name of the route is going to be ForgotPassword.
Next, add the a Button component after the Signup button. The value of the onPress prop of this button is going to be the handler method.
<Button
  title="Forgot Password?"
  onPress={this.goToForgotPassword}
  titleStyle={{
    color: '#039BE5'
  }}
  type="clear"
/>
Now, open a simulator or a real device with an Expo client installed and run the command expo start from a terminal window. You will be welcomed by the following screen.

Clicking on the button Forgot Password ? will lead you to the new screen.

Add a method to send a password reset email
The Firebase authentication module provides a method that you can use in React Native apps to send a link to the user's registered email id with the app. Users can click the link to reset the password. Firebase does this on its own. You do not have to write the server code to add this functionality to your app.
To start, open config/Firebase/firebase.js file and add the following method. You will use this method inside the ForgotPassword component by providing the user's email as input.
passwordReset: email => {
  return firebase.auth().sendPasswordResetEmail(email)
},
That's all you need to configure the Firebase app to make sure it sends the email on the registered email id.
To extend this further, you can try and customize the Email template that Firebase uses to send the reset password link here.
Create a Form
Using the previously obtained knowledge of Formik ad yup let us add an input field and a button. The input field will take in the email and the button will be responsible to perform the action of submitting the form. In other words, it will trigger the network to reset the user's email in a handler method.
Open ForgotPassword.js file and add the following import statements.
import React, { Component, Fragment } from 'react'
import { Text, SafeAreaView, View, StyleSheet } from 'react-native'
import { Formik } from 'formik'
import * as Yup from 'yup'
import FormInput from '../components/FormInput'
import FormButton from '../components/FormButton'
import ErrorMessage from '../components/ErrorMessage'
import { withFirebaseHOC } from '../config/Firebase'
After the import statements, add validationSchema object. This object is similar to that used in Login component and will help to determine whether the input provided already exists as the registered email or not.
const validationSchema = Yup.object().shape({
  email: Yup.string()
    .label('Email')
    .email('Enter a valid email')
    .required('Please enter a registered email')
})
Go the render function, and replace its existing content to the form below.
render() {
    return (
      <SafeAreaView style={styles.container}>
        <Text style={styles.text}>Forgot Password?</Text>
        <Formik
          initialValues={{ email: '' }}
          onSubmit={(values, actions) => {
            this.handlePasswordReset(values, actions)
          }}
          validationSchema={validationSchema}>
          {({
            handleChange,
            values,
            handleSubmit,
            errors,
            isValid,
            touched,
            handleBlur,
            isSubmitting
          }) => (
            <Fragment>
              <FormInput
                name='email'
                value={values.email}
                onChangeText={handleChange('email')}
                placeholder='Enter email'
                autoCapitalize='none'
                iconName='ios-mail'
                iconColor='#2C384A'
                onBlur={handleBlur('email')}
              />
              <ErrorMessage errorValue={touched.email && errors.email} />
              <View style={styles.buttonContainer}>
                <FormButton
                  buttonType='outline'
                  onPress={handleSubmit}
                  title='Send Email'
                  buttonColor='#039BE5'
                  disabled={!isValid || isSubmitting}
                />
              </View>
              <ErrorMessage errorValue={errors.general} />
            </Fragment>
          )}
        </Formik>
      </SafeAreaView>
    )
  }
In the above code snippet, the elements such as FormInput, FormButton and ErrorMessage are some re-usable custom presentational components that you can find inside components/ directory. this.handlePasswordReset(values, actions) is the handler method that accepts two parameters. You will write the logic behind this method in the next section.
The corresponding styles to the component are:
const styles = StyleSheet.create({
  container: {
    flex: 1,
    backgroundColor: '#fff',
    marginTop: 150
  },
  text: {
    color: '#333',
    fontSize: 24,
    marginLeft: 25
  },
  buttonContainer: {
    margin: 25
  }
})
Lastly, do not forget to wrap the ForgotPassword with the Firebase High Order Component withFirebaseHOC to use passwordReset method as props.
export default withFirebaseHOC(ForgotPassword)
Now go back to the simulator and you will get the following screen.
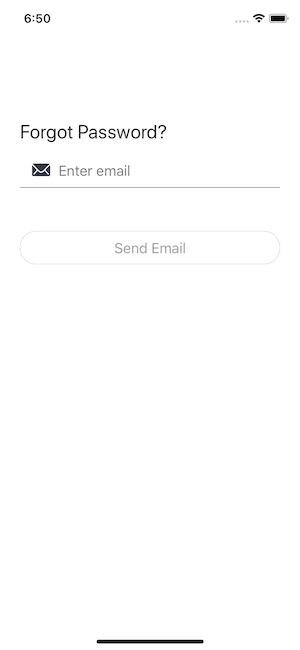
Handle Password Reset
Inside the ForgotPassword component create a new handler method called handlePasswordReset. This is going to be an asynchronous function that will accept the user's email as the parameter from the Formik's values.
Also, pass the actions from Formik as the second parameter. Instead of just console logging the error values, to display the error on the screen, Formik provides setFieldError.
handlePasswordReset = async (values, actions) => {
  const { email } = values

  try {
    await this.props.firebase.passwordReset(email)
    console.log('Password reset email sent successfully')
    this.props.navigation.navigate('Login')
  } catch (error) {
    actions.setFieldError('general', error.message)
  }
}
The above snippet signifies that if the email provided as the input is valid, it will send the request to reset the password. On success, a message on Expo's console will be displayed as shown below.
![]()
Also, on success, it will navigate the user back to the login screen. On errors, the code inside the catch block will be triggered.
To try it out, register a user with a valid email address such that you can receive an email. On registering a new user, right now, the app will log you in. Sign out from the app which will take you back to the login screen. Next, go the Forgot Password screen and enter the valid email.

You will receive an email like the below. It uses the default Firebase template. To demonstrate, I am using my personal Gmail address.

Click on the link and it will redirect you to a webpage like below.

Upon successful password change, it will prompt with the following message to the user.

Conclusion
That's it! It is that simple. With a new password, you can try to login to the app now and it will work. If you have come this far, I am hope enjoyed reading this post. These are some of the strategies I try to follow with any Firebase + React Native projects.
I hope any of the codebase used in this tutorial helps you. To find the complete code, you will have to visit this Github repo release.
Originally published at Heartbeat.Fritz.ai
I often write on Nodejs, Reactjs, and React Native. You can subscribe to my weekly newsletter to receive new updates straight to your inbox 💌


Top comments (8)
Firebase only send a link but you must provide that link Right and actually write code that will take care of that password update process I am asking how can you do that on the web how to take user new password and update it to the firebase doesn't it require authentication
Have you seen the later half of my post? I have provided screenshots that Firebase not only sends a link but also with the link a minimal UI interface to change the password as well as backend interface to change the password. I am referring to this: res.cloudinary.com/practicaldev/im...
The email to reset password is actually sent uniquely to the email id of a registered user. It is not available for anyone to access.
Looks like I have changed the password reset email template and replaced it with my own link how can I get that link which have minimal UI
If you are replacing it with your link, please refer to Firebase docs about customizing or using the default UI when using Firebase.
No I want to use the default one which have minimal UI how can I do that??
it is enabled by default. If you have changed the settings you might want to look at them again. Or search their docs.
The password update send the email with the link to the user but how can you actually allow changes while user is outside the. App how will it know and alow user to change new password with the links sent
I am not sure I understand the first half of your comment.
Firebase sends the user a link to change the password on the email. On clicking the email, the user can go through the process of setting up a new password. After the new password is set, the user can use that new credential to login the app. The new credential is saved in Firebase as soon as the user has set it. This is a common practice that apps/websites handle password resets. In this case, this is handle by the Firebase.