


TL;DR: The Microsoft Azure Functions is a solution which enables developers running small serverless pieces of code (functions in the cloud) without worrying about a whole application or the infrastructure to run it. They can be used as a backend for web or mobile applications. In this article, we will present how to access an Azure Function secured by Auth0 from a Xamarin Forms application. If needed, you can also check this GitHub repository to get more information.
"Learn how to develop modern applications with Xamarin Forms and Azure Functions."
Tweet This

Introducing Microsoft Azure Cloud Platform
Microsoft Azure is a platform which provides components to quickly create, implement, and manage cloud solutions. It offers a wide range of application, computing, warehouse, network services, and supports all three models of cloud services:
Microsoft Azure is available through a web portal where all mentioned components can be created and configured. In this article, we will use Azure Functions: a PaaS solution that enables developers running small pieces of code without bothering about the whole application or the infrastructure to run it.
Creating an Azure account is free of charge but you have to provide some credit card information. There will be no charge, except for a temporary authorization hold. Microsoft offers $200 credit for starting to explore services for 30 days.
If you decide not to upgrade at the end of 30 days or once you've used up your $200 credit, any products you’ve deployed will be decommissioned and you won’t be able to access them. You will not be charged and you can always upgrade your subscription.
Using Azure Functions as a Serverless Backend
There are many cases where Azure Functions can be used. For example, they can be used to integrate different systems, for data processing, or to build simple APIs and microservices. The Microsoft Azure cloud platform provides different initial templates for Azure Functions. Below there are some examples of them:
- HTTPTrigger—Triggers the execution of a function code on HTTP requests.
- TimerTrigger—Executes cleanup or other batch tasks on a predefined interval.
- QueueTrigger—Respond to messages as they arrive in an Azure Storage queue.
In this article, we will use the HTTPTrigger template to create our Azure Function. This function will be secured by Auth0 so, before accessing it, users will have to authenticate. These users will use (and authenticate through) a Xamarin Forms application which will then submit requests to our Azure Function.
"Azure Functions enables developers running small pieces of code without bothering about the whole application or the infrastructure to run it."
Tweet This
Creating Azure Functions
You can create the Azure Function in the Azure portal. Follow the steps below to create new Azure Function with HTTPTrigger template:
- Click the "Create a resource" button in the left top corner.
- Type "Function app" in the search window.
- Select "Function app" from the list.
- Click the "Create" button.
In this step, you have to provide few details:
- App name: This will be the name of the Azure Function. You can add something like "auth0-function-app". In my case, I used "auth0securedfunction" but you can't use the same as the name has to be unique.
- Subscription: This is the type of the subscription that you have.
- Resource group: This will be the group where function app will be located. You can select "Create new" and type "function-app-rg".
- OS: As the host operating system, you can select "Windows".
- Hosting plan: You can set it as "Consumption Plan" so you pay only for the number of executions.
- Location: It is a good idea to create the function in a region near you.
- Storage: Some functionalities connected with Azure Functions require storage. You can just select "Create new" and leave the name as it is.
Once you fill all the required information click the "Create" button.
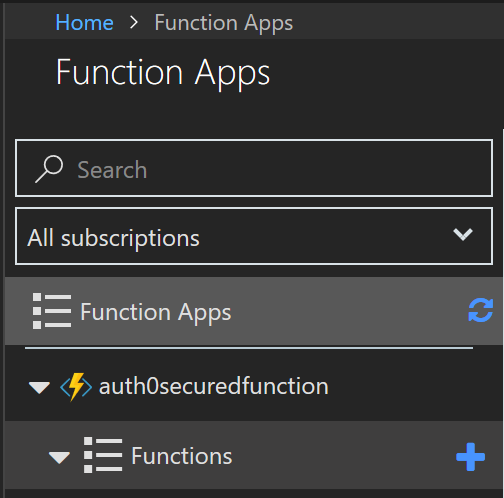
After a short time, the Function App will be created and notification will show up. After that, select "Function App" from the left bar. A blade with the created function app should appear. Expand it and move the mouse cursor on the "Functions" header and click the "+" button.
Another blade with templates will be displayed. From there, choose "HTTPTrigger C#" template, fill the name field with "Auth0FunctionApp" and change authorization level to "Anonymous". After a few seconds, the HTTPTrigger function will be ready for you.
Scaffolding the Project
The default template needs some adjustments. For the authentication process, we will use the Microsoft.IdentityModel.Protocols.OpenIdConnect NuGet package. So, open the "View files" tab on the right and click the "Add" button. You will have to create a new JSON file which will contain information about the required NuGet packages. Type project.json as the file name and hit "Enter". Once the file is created, you have to define its structure. So, paste the following code and click on the "Save" button:
{
  "frameworks": {
    "net46":{
      "dependencies": {
        "Microsoft.IdentityModel.Protocols.OpenIdConnect": "5.2.2"
      }
    }
   }
}
Once the NuGet package is installed, proper information will be displayed in the Logs console.
Signing Up to Auth0
As you are going to use Auth0 to handle authentication, you will have to sign up to it. If you don't have an account yet, you can sign up for a free one here.
Creating an Auth0 API for Azure Functions
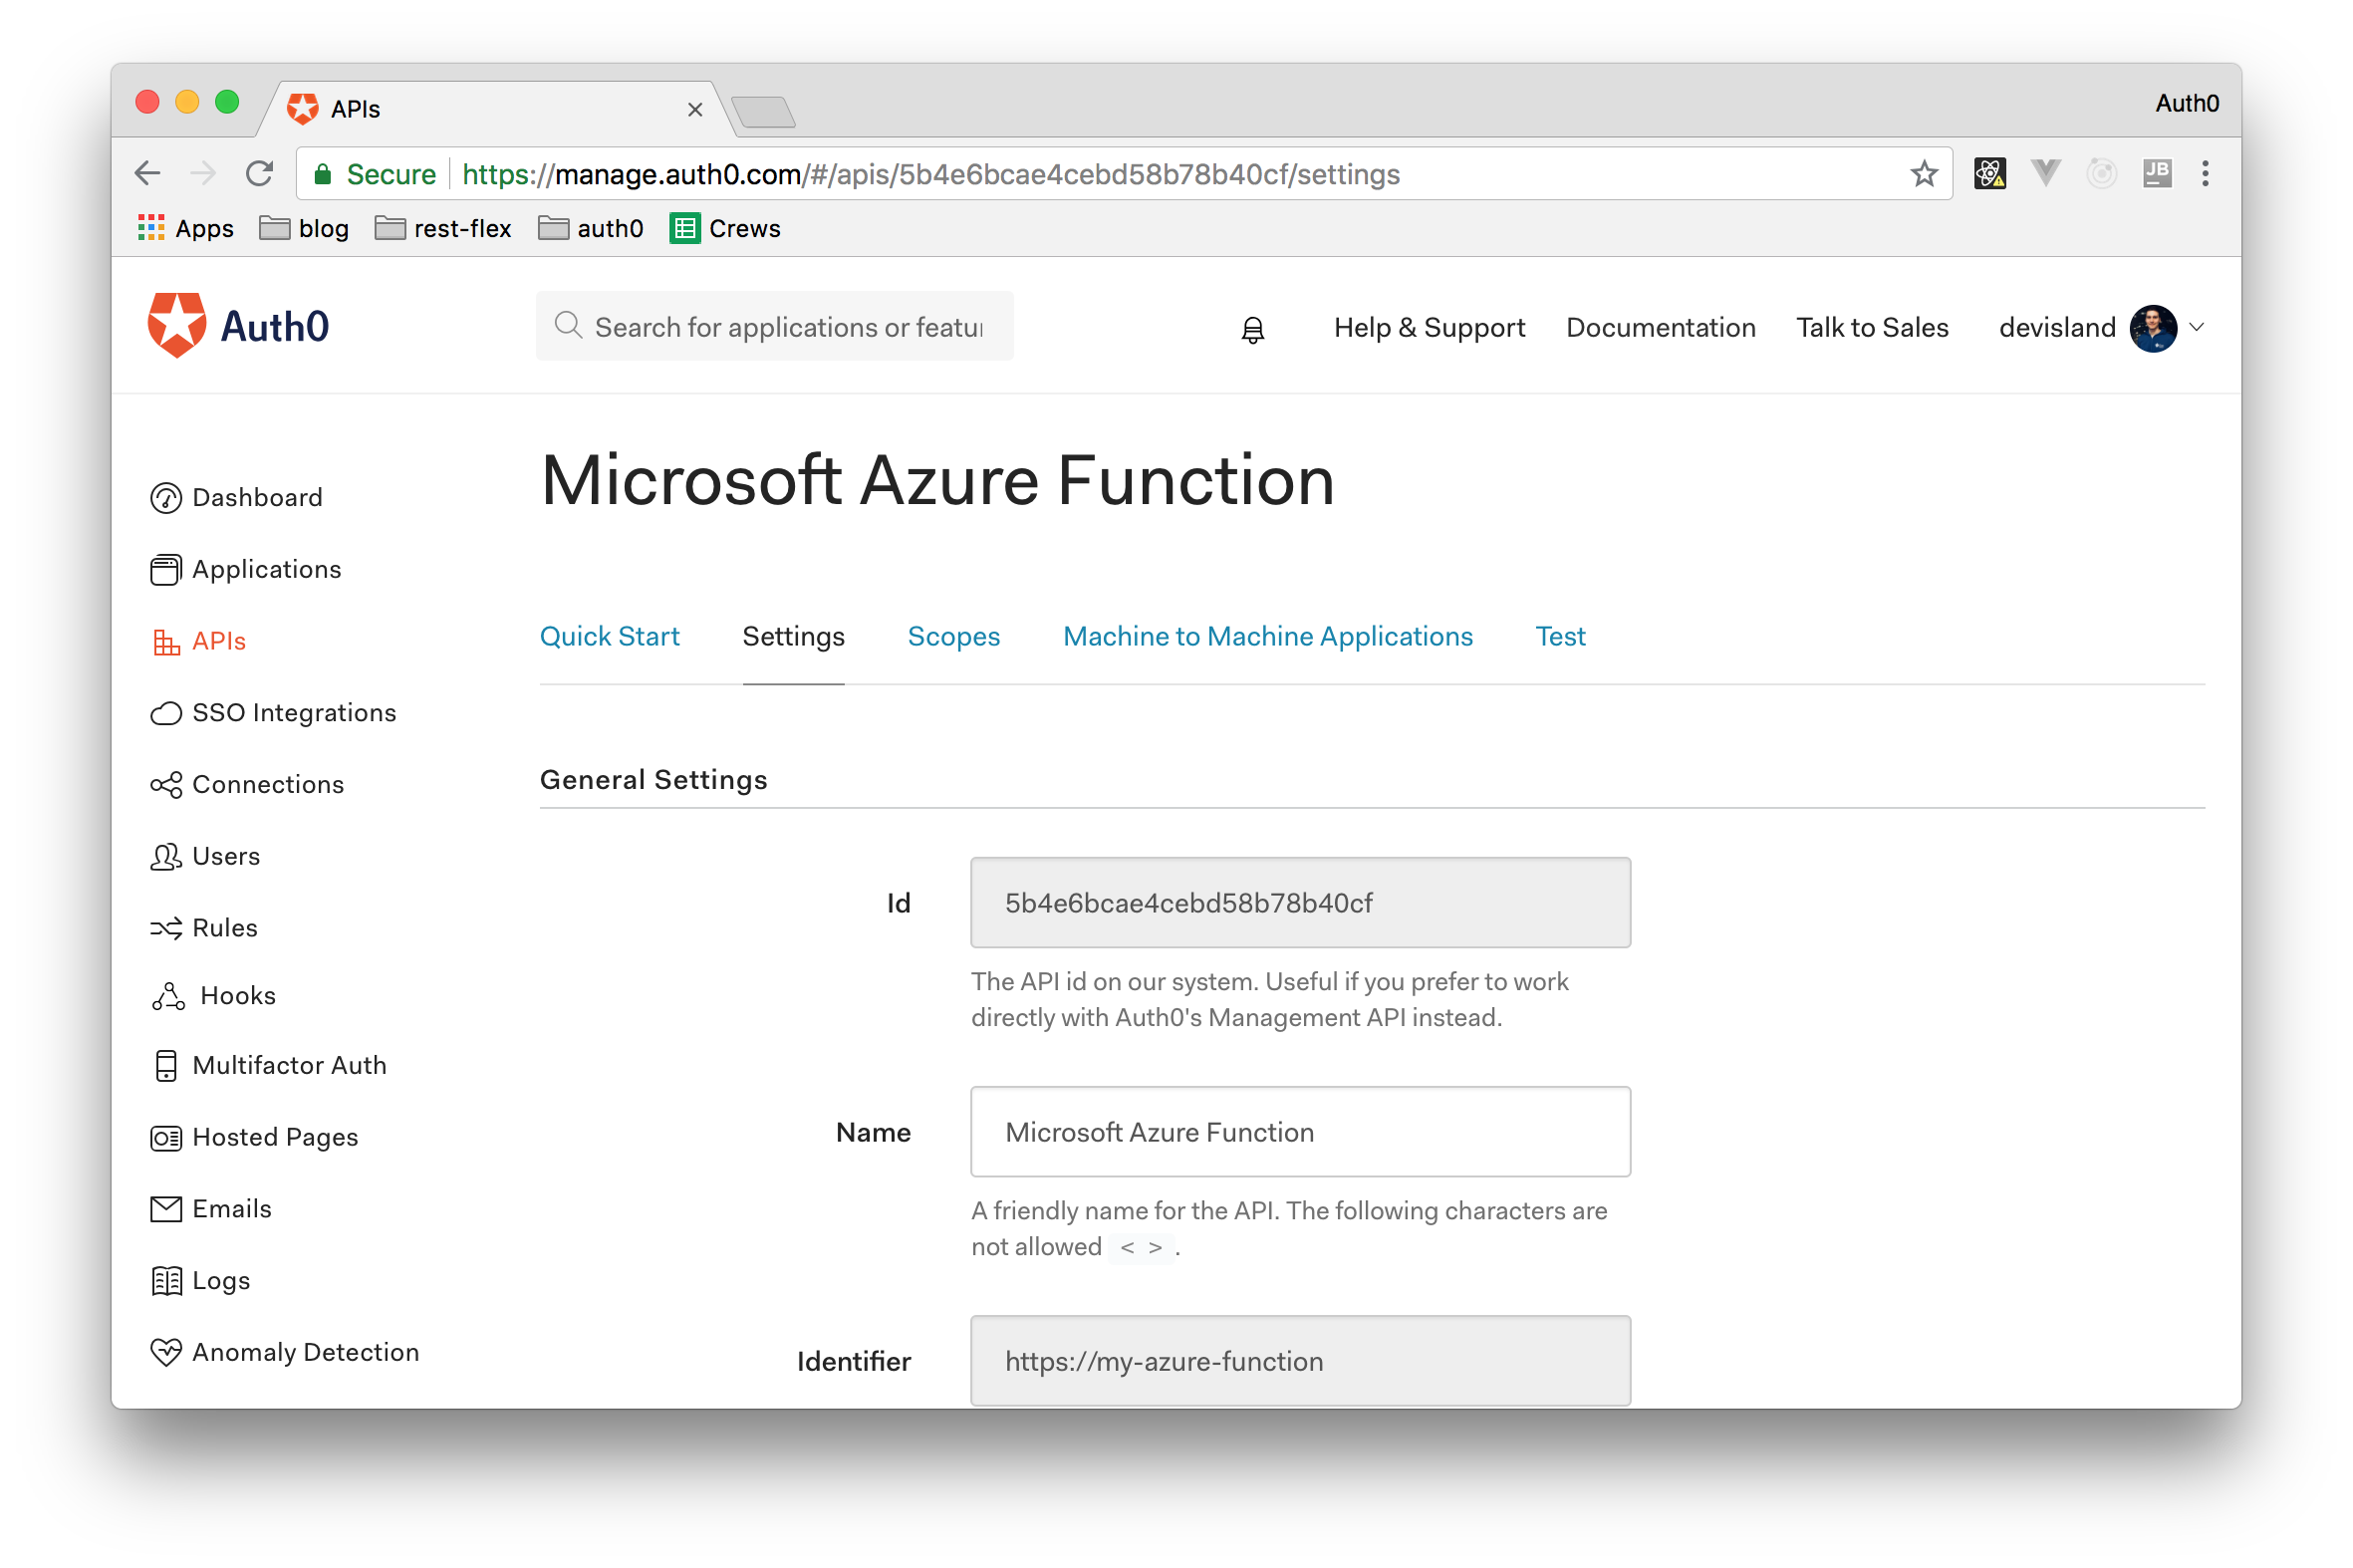
To represent your Azure Functions on Auth0, you will have to create an Auth0 API. So, open the "APIs" section and click on the "Create API" section. Auth0 will show you a dialog where you will have to provide name for your new API (you can input something like "Microsoft Azure Function", an identifier (in this case, you can input something like https://my-azure-function, you will need it later), and a signing algorithm (you can leave this as RS256). Then, click the "Create" button and, after a few seconds, you will be redirected to the Quick Start section of the API just created. From there, you can click on the Settings tab to copy the Identifier (also known as audience) of the API. You will use this value in the Azure Function source code to validate access_tokens.
Developing the Azure Function
As mentioned, access to the Azure Function will be secured by Auth0. As such, users have to authenticate in the Xamarin Forms application to then send requests with the access_token to the function. Here, OpenID Connect will be used to verify user identity and, once it's confirmed, a response with greeting will be returned.
So, now, you will have to open the run.csx file from the "View files" tab on you Azure dashboard. This is the place where the function source code should be placed. Let's discuss it.
Below, you can see the AuthenticationService class source code which will be used to get validate the access token users retrieve from Auth0:
public static class AuthenticationService
{
  private static readonly IConfigurationManager<OpenIdConnectConfiguration> _configurationManager;

  private static readonly string ISSUER = ""; //From Auth0 portal, ex: https://devisland.eu.auth0.com/
  private static readonly string AUDIENCE = ""; // From Auth0 portal, ex: my-azure-function

  static AuthenticationService()
  {
    var documentRetriever = new HttpDocumentRetriever { RequireHttps = ISSUER.StartsWith("https://") };

    _configurationManager = new ConfigurationManager<OpenIdConnectConfiguration>(
      $"{ISSUER}.well-known/openid-configuration",
      new OpenIdConnectConfigurationRetriever(),
      documentRetriever
    );
  }

  public static async Task<ClaimsPrincipal> ValidateTokenAsync(string bearerToken, TraceWriter log)
  {
    ClaimsPrincipal validationResult = null;
    short retry = 0;
    while(retry <=0 && validationResult == null)
    {
      try
      {
        var openIdConfig = await _configurationManager.GetConfigurationAsync(CancellationToken.None);

        TokenValidationParameters validationParameters =
          new TokenValidationParameters
          {
              ValidIssuer = ISSUER,
              ValidAudiences = new[] { AUDIENCE },
              IssuerSigningKeys = openIdConfig.SigningKeys
          };

        SecurityToken validatedToken;
        JwtSecurityTokenHandler handler = new JwtSecurityTokenHandler();
        validationResult = handler.ValidateToken(bearerToken, validationParameters, out validatedToken);


        log.Info($"Token is validated. User Id {validationResult.Claims.FirstOrDefault(c => c.Type == ClaimTypes.NameIdentifier)?.Value}");

        return validationResult;
      }
      catch (SecurityTokenSignatureKeyNotFoundException)
      {
        log.Info("SecurityTokenSignatureKeyNotFoundException exception thrown. Refreshing configuration...");
        _configurationManager.RequestRefresh();
        retry ++;
      }
      catch (SecurityTokenException)
      {
        log.Info("SecurityTokenException exception throwns. One more attempt...");
        return null;
      }
    }
    return validationResult;
  }
}
Let's describe the above code functionality. First of all, the Issuer and Audience values have to be filled. You can obtain them from your Auth0 dashboard:
private static readonly string ISSUER = ""; //From Auth0 portal, ex: https://devisland.eu.auth0.com/
private static readonly string AUDIENCE = ""; // From Auth0 portal, ex: my-azure-function
To verify tokens send to the function you have to use the ConfigurationManager class which uses OpenId configuration retrieved from Auth0. This ConfigurationManager instance is created in the constructor:
static AuthenticationService()
{
  var documentRetriever = new HttpDocumentRetriever { RequireHttps = ISSUER.StartsWith("https://") };

  _configurationManager = new ConfigurationManager<OpenIdConnectConfiguration>(
    $"{ISSUER}.well-known/openid-configuration",
    new OpenIdConnectConfigurationRetriever(),
    documentRetriever
  );
}
The ValidateTokenAsync method is responsible for the token verification. Validation is done through the JwtSecurityTokenHandler instance using OpenId configuration retrieved from the Auth0. Please, note that the catch clause is used to handle the "SecurityTokenSignatureKeyNotFoundException" exception. It is required to refresh token when the issuer changed its signing keys:
public static async Task<ClaimsPrincipal> ValidateTokenAsync(string bearerToken, TraceWriter log)
{
  ClaimsPrincipal validationResult = null;
  short retry = 0;
  while(retry <=0 && validationResult == null)
  {
    try
    {
    var openIdConfig = await _configurationManager.GetConfigurationAsync(CancellationToken.None);

      TokenValidationParameters validationParameters =
        new TokenValidationParameters
        {
            ValidIssuer = ISSUER,
            ValidAudiences = new[] { AUDIENCE },
            IssuerSigningKeys = openIdConfig.SigningKeys
        };

      SecurityToken validatedToken;
      JwtSecurityTokenHandler handler = new JwtSecurityTokenHandler();
      validationResult = handler.ValidateToken(bearerToken, validationParameters, out validatedToken);


      log.Info($"Token is validated. User Id {validationResult.Claims.FirstOrDefault(c => c.Type == ClaimTypes.NameIdentifier)?.Value}");

      return validationResult;
    }
    catch (SecurityTokenSignatureKeyNotFoundException)
    {
      log.Info("SecurityTokenSignatureKeyNotFoundException exception occurred. Refreshing configuration...");
      _configurationManager.RequestRefresh();
      retry ++;
    }
    catch (SecurityTokenException)
    {
      log.Info("SecurityTokenException exception occurred. One more attempt...");
        return null;
    }
  }
  return validationResult;
}
Every Azure Function has the Run method which is executed once the function is called (in our case this happens through HTTP requests):
public static async Task<HttpResponseMessage> Run(HttpRequestMessage req, TraceWriter log)
{
  log.Info("C# HTTP trigger function processed a request.");

  var authorizationHeader  =  req.Headers.GetValues("Authorization").FirstOrDefault();
  log.Info("Validating token: " + authorizationHeader);

  if (authorizationHeader != null && authorizationHeader.StartsWith("Bearer"))
  {
    string bearerToken = authorizationHeader.Substring("Bearer ".Length).Trim();
    log.Info("Got token: " + bearerToken);
    ClaimsPrincipal principal;
    if ((principal = await AuthenticationService.ValidateTokenAsync(bearerToken, log)) == null)
    {
      log.Info("The authorization token is not valid.");
      return req.CreateResponse(HttpStatusCode.Unauthorized, "The authorization token is not valid.");
    }
  }
  else
  {
    return req.CreateResponse(HttpStatusCode.Unauthorized, "The authorization header is either empty or isn't Bearer.");
  }

  string name = req.GetQueryNameValuePairs()
    .FirstOrDefault(q => string.Compare(q.Key, "name", true) == 0)
    .Value;

  if (name == null)
  {
    dynamic data = await req.Content.ReadAsAsync<object>();
    name = data?.name;
  }

  return name == null
    ? req.CreateResponse(HttpStatusCode.BadRequest, "Please pass a name on the query string or in the request body")
    : req.CreateResponse(HttpStatusCode.OK, "Hello " + name + "!" +" Greetings from Azure Function secured with Auth0");
}
Let's describe the code above. Firstly, the bearer token (the access_token) is retrieved from an HTTP request header (Authorization. If it's empty, this function returns the 401 unauthorized HTTP status. When a token is attached to the request, the AuthenticationService instance verifies if the token is valid:
  var authorizationHeader  =  req.Headers.GetValues("Authorization").FirstOrDefault();
  log.Info("Validating token: " + authorizationHeader);

  if (authorizationHeader != null && authorizationHeader.StartsWith("Bearer"))
  {
    string bearerToken = authorizationHeader.Substring("Bearer ".Length).Trim();
    log.Info("Got token: " + bearerToken);
    ClaimsPrincipal principal;
    if ((principal = await AuthenticationService.ValidateTokenAsync(bearerToken, log)) == null)
    {
      log.Info("The authorization token is not valid.");
      return req.CreateResponse(HttpStatusCode.Unauthorized, "The authorization token is not valid.");
    }
  }
  else
  {
    return req.CreateResponse(HttpStatusCode.Unauthorized, "The authorization header is either empty or isn't Bearer.");
  }
Note that we are using
loggerhere to display information in the Logs console.
Then, once the token is verified, this function retrieves the name parameter from the query string. If it's not empty, a greeting text string is created and returned with HTTP status 200:
  string name = req.GetQueryNameValuePairs()
    .FirstOrDefault(q => string.Compare(q.Key, "name", true) == 0)
    .Value;

  if (name == null)
  {
    dynamic data = await req.Content.ReadAsAsync<object>();
    name = data?.name;
  }

  return name == null
    ? req.CreateResponse(HttpStatusCode.BadRequest, "Please pass a name on the query string or in the request body")
    : req.CreateResponse(HttpStatusCode.OK, "Hello " + name + "!" +" Greetings from Azure Function secured with Auth0");
And that's it. This is how your serverless function works.
Now, as you may know, the Azure Function is available under a specific URL address. You can find it by clicking on the "Get function URL" button at the top of it. It should look like the one presented below:
https://auth0securedfunction.azurewebsites.net/api/Auth0FunctionApp
You will use this URL in the Xamarin Forms application so copy it for the further usage.
Creating a Xamarin Forms Application
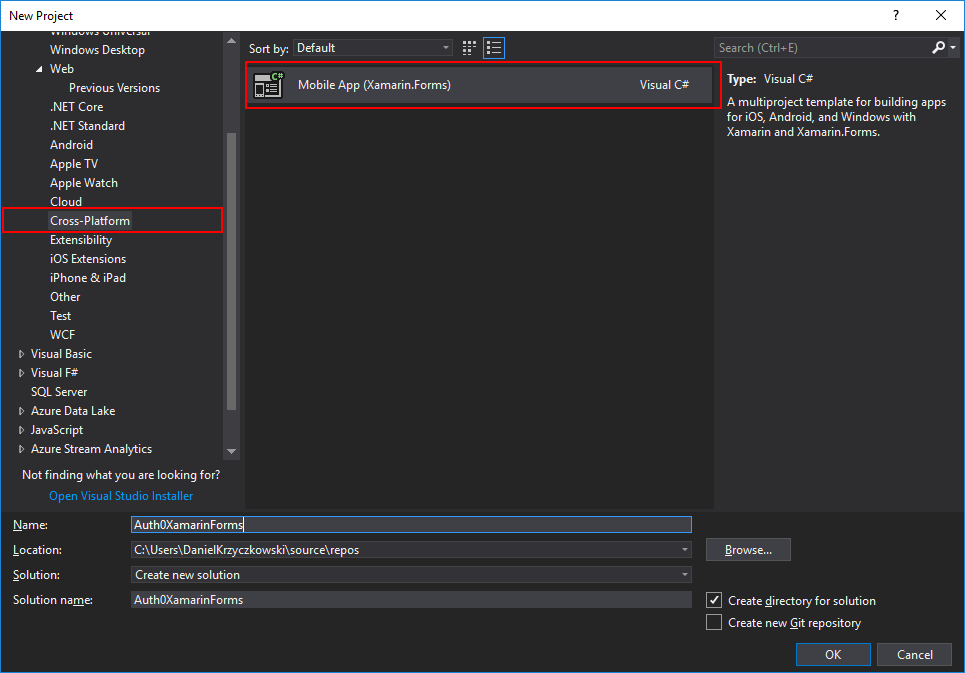
Xamarin platform provides the possibility to create cross-platform mobile applications with .NET C#. In this case, we decided to use Xamarin Forms approach to create the iOS, Android, and Universal Windows Platform (UWP) applications. So, open Visual Studio 2017 and create a new Xamarin Forms application project:
Remember to select Mobile development with .NET during Visual Studio 2017 installation so you can access Xamarin cross-platform project templates.
After a while, a Xamarin Forms application solution will be ready. Please note that there are four projects:
- iOS application project;
- Android application project;
- UWP application project;
- and the Core project.
The first three projects contain specific platform code and the Core project is where common logic (shared by other platform specific projects) should be placed.
Bootstrapping the Xamarin Forms Project
Once your Xamarin Forms application project is ready, you will need to install the following NuGet packages:
- Auth0.OidcClient.Android: you will use this NuGet package to integrate Auth0 in your Android application.
- Auth0.OidcClient.iOS: you will use this NuGet package to integrate Auth0 in your iOS application.
- Auth0.OidcClient.UWP: you will use this NuGet package to integrate Auth0 in your UWP application.
- RestSharp: you will use this NuGet package to issue HTTP requests to your serverless Azure Function.
All Auth0.OidcClient packages provide authentication functionality so users can sign in or sign up through your Xamarin Forms applications.
The RestSharp package will be used to connect your Xamarin Forms apps with you serverless Azure Functions through HTTP requests and to handle the responses.
After installing these packages, your project structure will be ready.
Creating an Auth0 Application
An Auth0 Application represents your client apps (in this case a mobile app) on Auth0. So, first, you will need to define the Application on Auth0 to then be able to add authentication in your Xamarin Forms application.
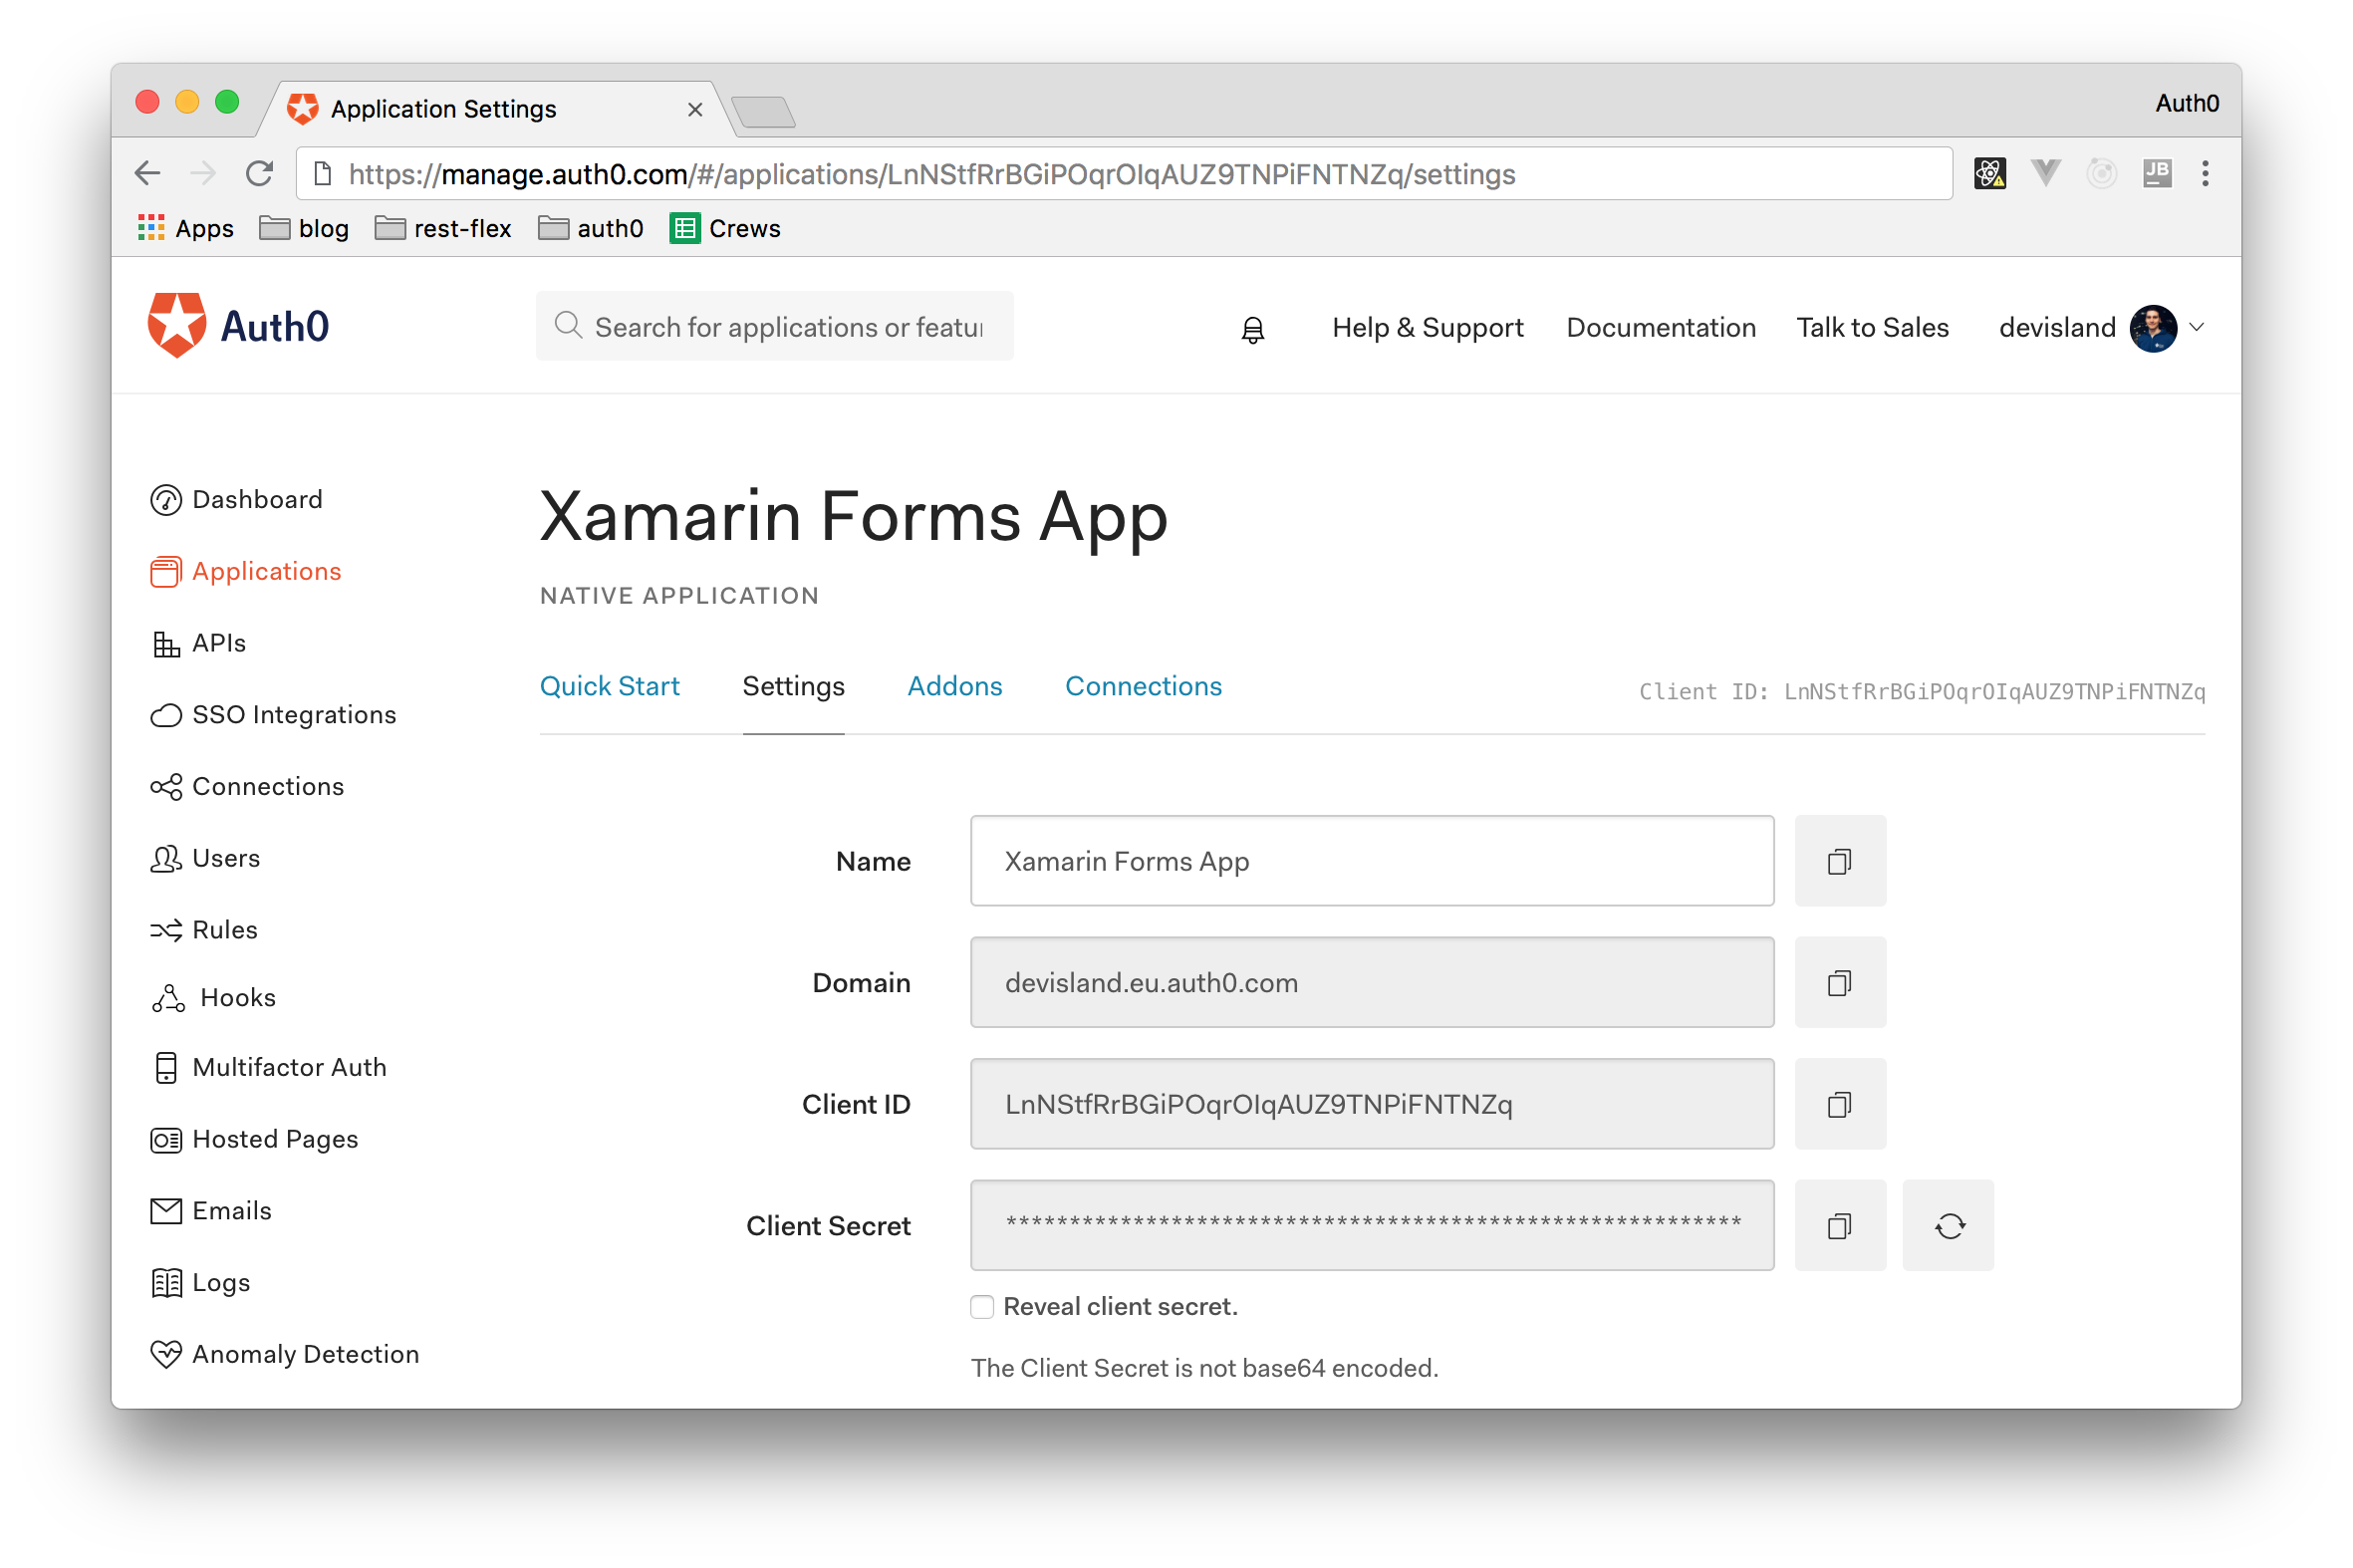
To create an Auth0 Application, go to the Applications section of your Auth0 dashboard and click on the Create Application button. In the dialog that the dashboard presents, you have to provide the name of the new application and choose an application type. For the name, you can add something like "Xamarin Forms App" and for the type you will have to select Native.
After inserting the name and choosing the type of the application, click on the Create button and, after few seconds, you should be redirected to the Quick Start section of your new application. From there, click on the Setting tab and leave the page open. Soon, you will need to copy the Domain and Client ID values to use in the Xamarin Forms application project.
Developing the Xamarin Forms App
Let's start by adding a new folder called Config in the project root directory. Inside this folder, you will place two static classes:
* AuthenticationConfig: a class which will contain your Auth0 configuration (i.e. the audience, the client ID, the and domain retrieved from your Auth0 dashboard).
* AzureConfig: a class which will contain the URL of the Azure Function before.
So, after creating a file for your AuthenticationConfig class, open this file and insert the following code inside it:
public static class AuthenticationConfig
{
    public const string Domain = ""; // Domain from Auth0 portal
    public const string ClientId = ""; // ClientId from Auth0 portal
    public const string Audience = ""; // Audience from Auth0 portal
}
Now, you will have to populate the fields above with the correct values. Both the Domain and ClientId fields can be populated with the info that you find in the Auth0 Application that you just created. The Audience will be the identifier of the Auth0 API that you created a few moments (e.g. https://my-azure-function). If you don't remember, go to the APIs section of your dashboard and check the value that you entered while creating your API.
After that, open the file created for the AzureConfig class and insert the following:
public static class AzureConfig
{
    public const string AzureFunctionUrl = ""; // Azure Function URL from Azure Portal. ex: https://auth0securedfunctionapp.azurewebsites.net/api/Auth0AzureFunction
}
Be sure to input the URL of your Azure Function in the AzureFunctionUrl field.
Now, let's create a folder called Model and then create a class called AuthenticationResult inside it. Instances of this class will contain information about the authentication result including IdToken, AccessToken and Claims:
public class AuthenticationResult
{
    public string IdToken { get; set; }

    public string AccessToken { get; set; }

    public IEnumerable<Claim> UserClaims { get; set; }

    public bool IsError { get; }

    public string Error { get; }


    public AuthenticationResult() { }

    public AuthenticationResult(bool isError, string error)
    {
        IsError = isError;
        Error = error;
    }
}
As the next step, you will have to create a new folder called Services and a new folder called Interfaces inside it. Inside this last folder you will create two interfaces:
IAuthenticationService: an interface with theAuthenticatemethod and theAuthenticationResultproperty. This interface will be implemented in each platform project: Android, iOS, and UWP.IAzureFunctionDataService: an interface with theGetGreetingmethod which will be implemented to obtain greetings from your Azure Function once the user is authenticated.
So, open the file for the IAuthenticationService interface and insert this:
public interface IAuthenticationService
{
    Task<AuthenticationResult> Authenticate();
    AuthenticationResult AuthenticationResult { get; }
}
After that, open the file for the IAzureFunctionDataService and insert this:
public interface IAzureFunctionDataService
{
    Task<string> GetGreeting(AuthenticationResult authenticationResult);
}
Now it's time to implement the user interface of the application. So, create a folder called Pages in the Core project and then add two content pages: LoginPage and MainPage. To achieve, this right click on the folder, select "Add" then "New item" and select "Content Page".
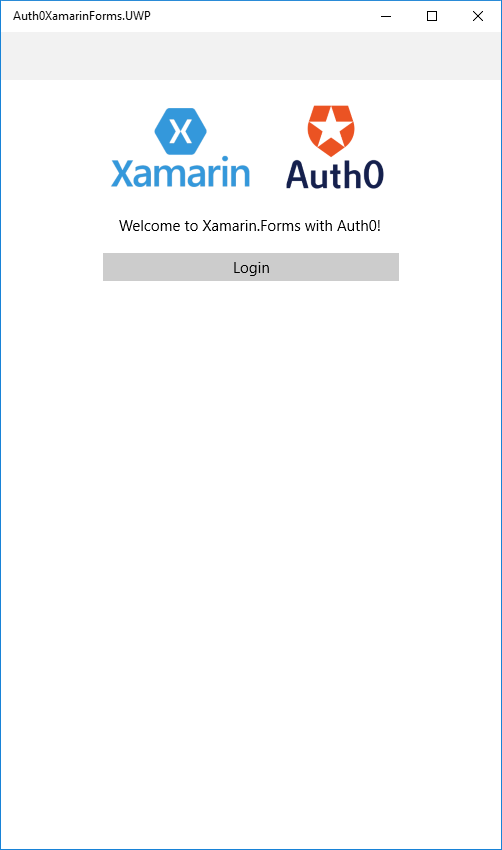
Here is the source code for the LoginPage.xaml file. As you can see, there is an image on the top, a label below it with the "Welcome to Xamarin.Forms with Auth0!" text and a login button below:
<?xml version="1.0" encoding="utf-8" ?>
<ContentPage xmlns="http://xamarin.com/schemas/2014/forms"
xmlns:x="http://schemas.microsoft.com/winfx/2009/xaml"
x:Class="Auth0XamarinForms.Core.Pages.LoginPage">
<ContentPage.Content>
<StackLayout HorizontalOptions="Center">
<Image x:Name="LogoImage" Margin="0,20,0,0"/>
<Label x:Name="MainPageLabel" Text="Welcome to Xamarin.Forms with Auth0!" HorizontalOptions="Center" VerticalOptions="Center" Margin="0,10,0,0" />
<Button Text="Login" Clicked="Login_Clicked" Margin="0,10,0,0"/>
</StackLayout>
</ContentPage.Content>
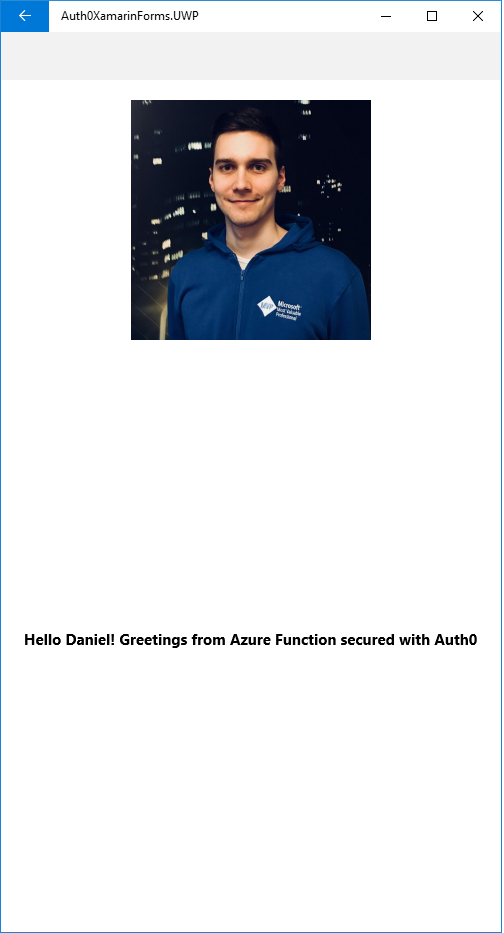
</ContentPage>Here is the source code for the MainPage.xaml file. Once your users authenticate, their profile picture and a greetings message from your Azure Function will be displayed:
<?xml version="1.0" encoding="utf-8" ?>
<ContentPage xmlns="http://xamarin.com/schemas/2014/forms"
             xmlns:x="http://schemas.microsoft.com/winfx/2009/xaml"
             xmlns:local="clr-namespace:Auth0XamarinForms"
             x:Class="Auth0XamarinForms.Pages.MainPage">

    <StackLayout HorizontalOptions="Center">
        <Image x:Name="UserImage" Margin="0,20,0,0" HeightRequest="240" WidthRequest="240"/>
        <Label x:Name="GreetingLabel" HorizontalOptions="Center" VerticalOptions="CenterAndExpand" FontAttributes="Bold" />
    </StackLayout>

</ContentPage>
Now, as mentioned earlier in the article, you will need to implement the IAuthenticationService interface in each platform project (i.e. iOS, Android, and Universal Windows Platform).
Authenticating Users on the Android Application Project
In the Services folder, create a new class called AuthenticationService. This class will be responsible for handling the authentication process on Android. Please note that you will be using dependency injection to register the IAuthenticationService implementation.
Also, notice that a dedicated class provided by Auth0 (which is called Auth0Client) will handle the authentication. As such, you are using its instance in the Authenticate method below. If the authentication result is successful, you will have an IdToken, an AccessToken and a UserClaims:
[assembly: Dependency(typeof(AuthenticationService))]
namespace Auth0XamarinForms.Droid.Services
{
    public class AuthenticationService : IAuthenticationService
    {
        private Auth0Client _auth0Client;

        public AuthenticationService()
        {
            _auth0Client = new Auth0Client(new Auth0ClientOptions
            {
                Domain = AuthenticationConfig.Domain,
                ClientId = AuthenticationConfig.ClientId
            });
        }

        public AuthenticationResult AuthenticationResult { get; private set; }

        public async Task<AuthenticationResult> Authenticate()
        {
            var auth0LoginResult = await _auth0Client.LoginAsync(new { audience = AuthenticationConfig.Audience });
            AuthenticationResult authenticationResult;

            if (!auth0LoginResult.IsError)
            {
                authenticationResult = new AuthenticationResult()
                {
                    AccessToken = auth0LoginResult.AccessToken,
                    IdToken = auth0LoginResult.IdentityToken,
                    UserClaims = auth0LoginResult.User.Claims
                };
            }
            else
                authenticationResult = new AuthenticationResult(auth0LoginResult.IsError, auth0LoginResult.Error);

            AuthenticationResult = authenticationResult;
            return authenticationResult;
        }
    }
}
Now in the MainActivity class, you have to add an IntentFilter so the application knows when the Auth0 authentication dialog is closed once users authenticate:
[Activity(Label = "Auth0XamarinForms", Icon = "@mipmap/icon", Theme = "@style/MainTheme", MainLauncher = true, ConfigurationChanges = ConfigChanges.ScreenSize | ConfigChanges.Orientation)]
[IntentFilter(
new[] { Intent.ActionView },
Categories = new[] { Intent.CategoryDefault, Intent.CategoryBrowsable },
DataScheme = "", // App package name, ex: com.devisland.Auth0XamarinForms
DataHost = "", // Auth0 domain, ex: devisland.eu.auth0.com
DataPathPrefix = "/android/YOUR_ANDROID_PACKAGE_NAME/callback")]
public class MainActivity : global::Xamarin.Forms.Platform.Android.FormsAppCompatActivity
{
    protected override void OnCreate(Bundle bundle)
    {
        TabLayoutResource = Resource.Layout.Tabbar;
        ToolbarResource = Resource.Layout.Toolbar;

        base.OnCreate(bundle);

        global::Xamarin.Forms.Forms.Init(this, bundle);
        LoadApplication(new App());
    }

    protected override void OnNewIntent(Intent intent)
    {
        base.OnNewIntent(intent);

        Auth0.OidcClient.ActivityMediator.Instance.Send(intent.DataString);
    }
}
Note: You will have to replace
YOUR_ANDROID_PACKAGE_NAMEin the code snippet above with your own Android package name. If you don't know what is your package name, check this.
After that, you will have finished creating your Android Application Project.
Authenticating Users on the iOS Application Project
Now, inside the Services folder, create a new class called AuthenticationService. This class will be responsible for handling the authentication on the iOS platform. Please note that you will be using dependency injection to register the IAuthenticationService implementation.
This class looks exactly the same as in your Android project but here you are using a different NuGet package: Auth0.OidcClient.iOS.
[assembly: Dependency(typeof(AuthenticationService))]
namespace Auth0XamarinForms.iOS.Services
{
    public class AuthenticationService : IAuthenticationService
    {
        private Auth0Client _auth0Client;

        public AuthenticationService()
        {
            _auth0Client = new Auth0Client(new Auth0ClientOptions
            {
                Domain = AuthenticationConfig.Domain,
                ClientId = AuthenticationConfig.ClientId
            });
        }

        public AuthenticationResult AuthenticationResult { get; private set; }

        public async Task<AuthenticationResult> Authenticate()
        {
            var auth0LoginResult = await _auth0Client.LoginAsync(new { audience = AuthenticationConfig.Audience });
            AuthenticationResult authenticationResult;

            if (!auth0LoginResult.IsError)
            {
                authenticationResult = new AuthenticationResult()
                {
                    AccessToken = auth0LoginResult.AccessToken,
                    IdToken = auth0LoginResult.IdentityToken,
                    UserClaims = auth0LoginResult.User.Claims
                };
            }
            else
                authenticationResult = new AuthenticationResult(auth0LoginResult.IsError, auth0LoginResult.Error);

            AuthenticationResult = authenticationResult;
            return authenticationResult;
        }
    }
}
Now, in the AppDelegate class, you have to override the OpenUrl method to handle Auth0 dialog opened in the SFSafariViewController:
public override bool OpenUrl(UIApplication application, NSUrl url, string sourceApplication, NSObject annotation)
{
    ActivityMediator.Instance.Send(url.AbsoluteString);

    return true;
}
One more thing, you have to add CFBundleURLTypes key in the info.plist file so your application is able to use Auth0 to login through SFSafariViewController:
<key>CFBundleURLTypes</key>
<array>
    <dict>
        <key>CFBundleTypeRole</key>
        <string>None</string>
        <key>CFBundleURLName</key>
        <string>Auth0</string>
        <key>CFBundleURLSchemes</key>
        <array>
            <string>YOUR_APPLICATION_PACKAGE_IDENTIFIER</string>
        </array>
    </dict>
</array>
Be sure to replace YOUR_APPLICATION_PACKAGE_IDENTIFIER with the Bundle Identifier for your application, such as com.mycompany.myapplication.
After that, your iOS application will be ready.
Authenticating Users on the UWP Application Project
The last project to update is the UWP application. Again, inside the Services folder of this project, create the AuthenticationService class and insert the following code:
[assembly: Dependency(typeof(AuthenticationService))]
namespace Auth0XamarinForms.UWP.Services
{
    public class AuthenticationService : IAuthenticationService
    {
        private Auth0Client _auth0Client;

        public AuthenticationService()
        {
            _auth0Client = new Auth0Client(new Auth0ClientOptions
            {
                Domain = AuthenticationConfig.Domain,
                ClientId = AuthenticationConfig.ClientId
            });
        }

        public AuthenticationResult AuthenticationResult { get; private set; }

        public async Task<AuthenticationResult> Authenticate()
        {
            var auth0LoginResult = await _auth0Client.LoginAsync(new { audience = AuthenticationConfig.Audience });
            AuthenticationResult authenticationResult;

            if (!auth0LoginResult.IsError)
            {
                authenticationResult = new AuthenticationResult()
                {
                    AccessToken = auth0LoginResult.AccessToken,
                    IdToken = auth0LoginResult.IdentityToken,
                    UserClaims = auth0LoginResult.User.Claims
                };
            }
            else
                authenticationResult = new AuthenticationResult(auth0LoginResult.IsError, auth0LoginResult.Error);

            AuthenticationResult = authenticationResult;
            return authenticationResult;
        }
    }
}
That's it. Now you have implemented user authentication in the different projects (iOS, Android, and UWP) of your Xamarin Forms app and you are ready to integrate both your mobile app with your Azure Function.
Integrating Xamarin Forms and Azure Functions
Once the application user interface is ready, we have to integrate it into your Azure Function.
So, open the core project (where the pages of your application are located) and, inside the Services folder, add a new class called AzureFunctionDataService. This class will implement the IAuthenticationService interface (note that you are using Dependency Injection to register it). Then, in the GetGreeting method, the AuthenticationResult parameter should be passed. In this case, the RestSharp library is used to make HTTP requests to your Azure Function. When a valid token is passed in these requests, a greetings message from your Azure Function is returned:
[assembly: Dependency(typeof(AzureFunctionDataService))]
namespace Auth0XamarinForms.Core.Services
{
    public class AzureFunctionDataService : IAzureFunctionDataService
    {
        private RestClient _restClient;


        public AzureFunctionDataService()
        {
            _restClient = new RestClient(AzureConfig.AzureFunctionUrl);
        }

        public async Task<string> GetGreeting(AuthenticationResult authenticationResult)
        {
            var responseContent = string.Empty;
            var request = new RestRequest(Method.POST);
            request.AddHeader("Authorization", "Bearer " + authenticationResult.AccessToken);
            request.AddParameter("application/json", "{\"name\":\"Daniel\"}", ParameterType.RequestBody);
            var response = await _restClient.ExecuteTaskAsync<string>(request, default(CancellationToken));

            if (response.StatusCode == System.Net.HttpStatusCode.OK)
            {
                responseContent = response.Data;
            }

            return responseContent;
        }
    }
}
Finally, you have to connect everything together in the user interface. So, open the LoginPage.xaml.cs and, in the Login_Clicked method, you will call IAuthenticationService to handle the authentication. If succeeded, the IAzureFunctionDataService instance is invoked to send requests with the access token to your Azure Function. After that, the Azure Function will return a greetings message and the user's avatar will be shown:
private async void Login_Clicked(object sender, EventArgs e)
{
    var authenticationService = DependencyService.Get<IAuthenticationService>();
    var authenticationResult = await authenticationService.Authenticate();

    if (!authenticationResult.IsError)
    {
        var azureFunctionDataService = DependencyService.Get<IAzureFunctionDataService>();
        var dataFromAzureFunction = await azureFunctionDataService.GetGreeting(authenticationResult);
        if (!string.IsNullOrEmpty(dataFromAzureFunction))
            Navigation.PushAsync(new MainPage(dataFromAzureFunction, authenticationResult));
        else
            MainPageLabel.Text = "Cannot retrieve data from Azure Function. Please check configuration";
    }
}
To display the users' avatar and the greetings message, you will have to update the MainPage method as follows:
public MainPage(string greetingFromAzureFunction, AuthenticationResult authenticationResult)
{
InitializeComponent();
    GreetingLabel.Text = greetingFromAzureFunction;
    UserImage.Source = authenticationResult.UserClaims.FirstOrDefault(c => c.Type == "picture")?.Value;
}
And that's it. If you run your application now, you see something like the following:
Then, after authenticating yourself, you will be redirected to a screen like this:
"I just developed a mobile application with Xamarin Forms that communicates with an Azure Function."
Tweet This
Summary
In this tutorial, you learned how to develop a simple Xamarin Forms application that communicates with a serverless Azure Function. Both applications built throughout the article (the mobile app and the serverless function) are quite simple, but they give you enough knowledge to build more-complex applications while following an approach that is modern and secure at the same time.
If you have trouble while following the article you can always check the original GitHub repository that I've created while writing and you can get in touch through the comments section down below.


