
With Okta and OpenID Connect (OIDC) you can easily integrate authentication into an Ionic application, and never have to build it yourself again. OIDC allows you to authenticate directly against the Okta API, and this article shows you how to do just that in an Ionic application. I'll demo how to log in with OIDC redirect, using Okta's Auth SDK as well as how to use OAuth with Cordova's in-app browser; user registration is omitted as the feature is still under active development.
Why Ionic?
Ionic is an open source mobile SDK for developing native and progressive web applications. It leverages Angular and Apache Cordova to allow you to build mobile apps with HTML, CSS, and JavaScript. Apache Cordova embeds the HTML code inside a native WebView on the device, using a foreign function interface to access the native resources of it. You might've heard of PhoneGap - this is Adobe's commercial version of Cordova.
Cordova and PhoneGap allow you to target multiple platforms (e.g. Android and iOS) with one codebase. Not only that, but the apps look like native apps and perform just as well. If you need to tap into native features that aren't available in web technologies, there are a number of native plugins. Ionic Native is a curated set of these plugins.
I first started using Ionic in late 2013. The project I was working on was developing a native application, but wanted to build several screens of the application with HTML so web developers could author them. I wrote about my experience in March 2014. I enjoyed working with it and found that porting an existing app to use it was more about modifying HTML and tweaking CSS.
Ionic 2 was released in January, making it possible to develop Ionic applications with Angular. Ionic 3 was released in April, allowing development with Angular 4.
NOTE: “Angular” is the common name for Angular 2+. AngularJS is the common name for the 1.x versions. The reason for #ItsJustAngular is Angular 4 was released in March 2017. See Branding Guidelines for Angular and AngularJS for more information.
This article will show you how to build a simple Ionic application and add user authentication to it. Most applications require authentication, so they know who the user is. Once an app knows who you are, it can save your data and better personalization features.
Get Started with Ionic
To set up your environment to develop with Ionic, complete the following steps:
- Install Node.js
- Install Ionic and Cordova using npm:
npm install -g cordova ionic
Create an Ionic Application
From a terminal window, create a new application using the following command:
ionic start ionic-auth
You will be prompted to select a starter project. For this tutorial, choose the tabs starter project. When prompted to integrate your app with Cordova, answer yes. When prompted to install the free Ionic Pro SDK and connect your app, answer no.
Project creation may take a minute or two to complete, depending on your internet connection speed. Run the commands below to start your Ionic application.
cd ionic-auth
ionic serve
This command will open your default browser on http://localhost:8100. You can use Chrome's device toolbar to see what the application will look like on an iPhone 6.

One slick feature of Ionic's serve command is it shows compilation errors in the browser, rather than in the (sometimes hidden) developer console. For example, if you give an invalid type to the rootPage variable in app.component.ts, you'll see an error like the one below.

Add User Authentication
Ionic Cloud offers a free Auth service. It allows authentication with an email and password, as well as social providers like Facebook, Google, and Twitter. It provides several classes you can use to build authentication in its @ionic/cloud-angular dependency. It even has support for custom authentication, but it "requires your own server to handle authentication" and will be decommissioned on January 31, 2018.
While there aren't many current tutorials on using this service, there are a few from last year.
- Simon Reimler's Simple Ionic 2 Login with Angular 2
- Raymond Camden's An example of the Ionic Auth service with Ionic 2
- Josh Morony's Using JSON Web Tokens (JWT) for Custom Authentication in Ionic 2: Part 2
You might notice that both tutorials require quite a bit of code. Also, there doesn't seem to be a lot of documentation on how you can verify user credentials from the Auth service in a backend service.
Create an OpenID Connect App in Okta
OpenID Connect (OIDC) builds on top of the OAuth 2.0 protocol. It allows clients to verify the identity of the user and obtain their basic profile information. To integrate Okta's Identity Platform for user authentication, you'll first need to:
- Register and create an OIDC application
- Log in to your Okta account and navigate to Applications > Add Application
- Select SPA and click Next
- Give your application a name (e.g. "Ionic OIDC")
- Change the Base URI and Login redirect URI to
http://localhost:8100and click Done. You should see settings like the following:

Create a Login Page
Generate a login page for authentication by running the following command:
ionic g page Login
In the generated src/pages/login/login.html, add a form with username and password fields.
<ion-header>
  <ion-navbar>
    <ion-title>
      Login
    </ion-title>
  </ion-navbar>
</ion-header>
<ion-content padding>
  <form #loginForm="ngForm" (ngSubmit)="login()" autocomplete="off">
    <ion-row>
      <ion-col>
        <ion-list inset>
          <ion-item>
            <ion-input placeholder="Email" name="username" id="loginField"
                       type="text" required [(ngModel)]="username" #email></ion-input>
          </ion-item>
          <ion-item>
            <ion-input placeholder="Password" name="password" id="passwordField"
                       type="password" required [(ngModel)]="password"></ion-input>
          </ion-item>
        </ion-list>
      </ion-col>
    </ion-row>
    <ion-row>
      <ion-col>
        <div *ngIf="error" class="alert alert-danger">{{error}}</div>
        <button ion-button class="submit-btn" full type="submit"
                [disabled]="!loginForm.form.valid">Login
        </button>
      </ion-col>
    </ion-row>
  </form>
</ion-content>
You can leverage a couple of open source libraries to perform the actual authentication. The first one is Manfred Steyer's angular-oauth2-oidc. This library allows you to interact with identity and access tokens easily. The second is the Okta Auth SDK. OAuth is not an authentication protocol, but OIDC is. Why is it necessary to add Okta's authentication library then? Because OIDC authentication works via redirect (when using in a SPA) and I'd rather perform authentication without redirecting to Okta.
Install angular-oauth2-oidc and the Okta Auth SDK using npm.
npm install angular-oauth2-oidc @okta/okta-auth-js --save
In src/pages/login/login.ts, add the basic structure of the LoginPage class and a constructor that configures your OIDC settings with the OAuthService from angular-oauth2-oidc. You will need to replace {clientId} with the Client ID from your Okta OIDC settings and {yourOktaDomain} with your account's correct URI.
import { Component, ViewChild } from '@angular/core';
import { IonicPage, NavController } from 'ionic-angular';
import { JwksValidationHandler, OAuthService } from 'angular-oauth2-oidc';

@IonicPage()
@Component({
  selector: 'page-login',
  templateUrl: 'login.html'
})
export class LoginPage {
  @ViewChild('email') email: any;
  private username: string;
  private password: string;
  private error: string;

  constructor(private navCtrl: NavController, private oauthService: OAuthService) {
    oauthService.redirectUri = window.location.origin;
    oauthService.clientId = '{clientId}';
    oauthService.scope = 'openid profile email';
    oauthService.issuer = 'https://{yourOktaDomain}.com/oauth2/default';
    oauthService.tokenValidationHandler = new JwksValidationHandler();

    // Load Discovery Document and then try to login the user
    this.oauthService.loadDiscoveryDocument().then(() => {
      this.oauthService.tryLogin();
    });
  }

  ionViewDidLoad(): void {
    setTimeout(() => {
      this.email.setFocus();
    }, 500);
  }
}
Modify src/app/app.component.ts to check to see if the user is logged in. If they're not, set the LoginPage as the rootPage.
import { Component } from '@angular/core';
import { Platform } from 'ionic-angular';
import { StatusBar } from '@ionic-native/status-bar';
import { SplashScreen } from '@ionic-native/splash-screen';

import { TabsPage } from '../pages/tabs/tabs';
import { OAuthService } from 'angular-oauth2-oidc';
import { LoginPage } from '../pages/login/login';

@Component({
  templateUrl: 'app.html'
})
export class MyApp {
  rootPage: any = TabsPage;

  constructor(platform: Platform, statusBar: StatusBar, splashScreen: SplashScreen,
              oauthService: OAuthService) {
    if (oauthService.hasValidIdToken()) {
      this.rootPage = TabsPage;
    } else {
      this.rootPage = LoginPage;
    }

    platform.ready().then(() => {
      statusBar.styleDefault();
      splashScreen.hide();
    });
  }
}
Update src/app/app.module.ts to add OAuthModule, HttpClientModule, and LoginPageModule as imports.
import { LoginPageModule } from '../pages/login/login.module';
import { OAuthModule } from 'angular-oauth2-oidc';

@NgModule({
  ...
  imports: [
    BrowserModule,
    LoginPageModule,
    OAuthModule.forRoot(),
    IonicModule.forRoot(MyApp)
  ],
  ...
})
Run ionic serve to make sure the LoginPage is displayed when the app first loads. You'll see the following error when the app tries to load:
No provider for HttpClient!
This error happens because OAuthService has a dependency on Angular's Http, but it hasn't been imported into your project. Add HttpModule as an import in src/app/app.module.ts.
import { HttpClientModule } from '@angular/common/http';

@NgModule({
  ...
  imports: [
    ...
    HttpClientModule,
    ...
  ],
  ...
})
Now the login screen should load. You can use Chrome's Device Toolbar to see what it'll look like on an iPhone 6.

Add a login() method in src/app/pages/login/login.ts that uses the Okta Auth SDK to 1) login and 2) exchange the session token for an identity and access token. An ID token is similar to an identity card, in standard JWT format, signed by the OpenID Provider. Access tokens are part of the OAuth specification. An access token can be a JWT. They are used to access protected resources, often by setting them as an Authentication header when making a request.
import * as OktaAuth from '@okta/okta-auth-js';
import { TabsPage } from '../tabs/tabs';
...
login(): void {
  this.oauthService.createAndSaveNonce().then(nonce => {
    const authClient = new OktaAuth({
      clientId: this.oauthService.clientId,
      redirectUri: this.oauthService.redirectUri,
      url: 'https://{yourOktaDomain}.oktapreview.com',
      issuer: 'default'
    });
    return authClient.signIn({
      username: this.username,
      password: this.password
    }).then((response) => {
      if (response.status === 'SUCCESS') {
        return authClient.token.getWithoutPrompt({
          nonce: nonce,
          responseType: ['id_token', 'token'],
          sessionToken: response.sessionToken,
          scopes: this.oauthService.scope.split(' ')
        })
          .then((tokens) => {
            const idToken = tokens[0].idToken;
            const accessToken = tokens[1].accessToken;
            const keyValuePair = `#id_token=${encodeURIComponent(idToken)}&access_token=${encodeURIComponent(accessToken)}`;
            this.oauthService.tryLogin({
              customHashFragment: keyValuePair,
              disableOAuth2StateCheck: true
            });
          this.navCtrl.push(TabsPage);
          });
      } else {
        throw new Error('We cannot handle the ' + response.status + ' status');
      }
    }).fail((error) => {
      console.error(error);
      this.error = error.message;
    });
  });
}
You want an identity token so you can have more information about the user. You want an access token so you can use it to access protected APIs that require a Bearer token. For example, in Adding Authentication to Your Angular PWA, there's a BeerService that sends an access token when it makes an API request.
import { Injectable } from '@angular/core';
import { Http, Response, Headers, RequestOptions } from '@angular/http';
import 'rxjs/add/operator/map';
import { Observable } from 'rxjs';
import { OAuthService } from 'angular-oauth2-oidc';

@Injectable()
export class BeerService {

  constructor(private http: Http, private oauthService: OAuthService) {
  }

  getAll(): Observable<any> {
    const headers: Headers = new Headers();
    headers.append('Authorization', this.oauthService.authorizationHeader());

    let options = new RequestOptions({ headers: headers });

    return this.http.get('http://localhost:8080/good-beers', options)
      .map((response: Response) => response.json());
  }
}
You can (optionally), pretty up the login screen by adding a logo above the form. Download this image, copy it to src/assets/imgs/okta.png, and add the following above the <form> tag in login.html. You might want to edit the image so it's only 300 pixels wide. This reduces its size to 12 KB instead of 110 KB.
<ion-row>
  <ion-col text-center>
    <img src="assets/imgs/okta.png" width="300">
  </ion-col>
</ion-row>
When you sign in, there's not much proof on the UI. Add a “Logout” button in the top right corner of the home screen. Replace the <ion-header> in src/pages/home/home.html with the HTML below.
<ion-header>
  <ion-navbar>
    <ion-title>Home</ion-title>
    <ion-buttons end>
      <button ion-button (click)="logout()">
        Logout
      </button>
    </ion-buttons>
  </ion-navbar>
</ion-header>
In src/pages/home/home.ts, add a logout() method, as well as methods to get a name and claims from the identity token. Claims in an ID token are bits of information about the issuer, the user, intended audience, expiration date, and issue date. You can see the standard claims in the OIDC spec.
import { Component } from '@angular/core';
import { App } from 'ionic-angular';
import { LoginPage } from '../login/login';
import { OAuthService } from 'angular-oauth2-oidc';

@Component({
  selector: 'page-home',
  templateUrl: 'home.html'
})
export class HomePage {

  constructor(public app: App, public oauthService: OAuthService) {
  }

  logout() {
    this.oauthService.logOut(true);
    this.app.getRootNavs()[0].setRoot(LoginPage);
  }

  get givenName() {
    const claims: any = this.oauthService.getIdentityClaims();
    if (!claims) {
      return null;
    }
    return claims.name;
  }

  get claims() {
    return this.oauthService.getIdentityClaims();
  }
}
To display this information on the home tab, add the following HTML just after the second paragraph in src/app/home/home.html.
<div *ngIf="givenName">
  <hr>
  <p>You are logged in as: <b>{{ givenName }}</b></p>
  <div class="claims">
    <strong>Claims from Identity Token JWT:</strong>
    <pre>{{claims | json}}</pre>
  </div>
</div>
Update src/app/home/home.scss to add some CSS to make the raw JSON look a bit better.
page-home {
  .claims {
    pre {
      color: green;
    }
  }
  pre {
    border: 1px solid silver;
    background: #eee;
    padding: 10px;
  }
}
Now you should see your name and claims information displayed when you log in.

You should also be able to log out and see the login screen with its logo.
![]()
Deploy to a Mobile Device
It's pretty cool that you're able to develop mobile apps with Ionic in your browser. However, it's nice to see the fruits of your labor and validate how awesome your app looks on a phone. It does look and behave like a native app!
To see how your application will look on different devices you can run ionic serve --lab. The --lab flag opens a page in your browser that lets you see how your app will display on various devices.

The LoginPage tries to auto-focus onto the email field when it loads. To auto-activate the keyboard you'll need to tell Cordova it's OK to display the keyboard without user interaction. You can do this by adding the following to config.xml in the root directory.
<preference name="KeyboardDisplayRequiresUserAction" value="false" />
iOS
To emulate or deploy to an iOS device, you'll need a Mac and a fresh installation of Xcode. If you'd like to build iOS apps on Windows, Ionic offers an Ionic Package service.
Make sure to open Xcode to complete the installation. Then run ionic cordova emulate ios to open your app in Simulator.
You may encounter an error like the following:
** BUILD SUCCEEDED **

Error: Cannot read property 'replace' of undefined

[ERROR] An error occurred while running cordova emulate ios (exit code 1).
This is a known issue and can be solved by running the following commands:
cd platforms/ios/cordova && npm install ios-sim
TIP: The biggest problem I found when running the app in Simulator was that it was difficult to get the keyboard to pop up. To workaround this, I used Hardware > Keyboard > Toggle Software Keyboard when I needed to type text in a field.
If you enter your credentials on the login screen you'll notice nothing happens. Open Safari and navigate to Develop > Simulator > MyApp / Login, and you'll see that eventually, an error shows up in the console. If you don't see a Develop menu, review the steps in this article to enable it.

If you use the Network tab, you can see that only one network request is made (to /authn), which is different than the two requests (to /authn and /authorize) that are made when running in a browser.

I believe this doesn't work when the app is packaged with Cordova because it's making a request to the server with an embedded iframe that then posts back to the current window using postMessage. It seems that Ionic/Cordova doesn't support this flow (yet). To work around this issue, you can talk directly to Okta's OAuth service using an in-app browser that's provided by Cordova. Nic Raboy shows how to do this with Facebook in Using An OAuth 2.0 Service Within An Ionic 2 Mobile App.
Install the Cordova In-App Browser plugin using the following command:
ionic cordova plugin add cordova-plugin-inappbrowser
Open src/app/pages/login/login.html and wrap the <form> with a <div> that only shows this login form when running in a browser. Add a new <div> that is displayed when running in an emulator or on a device.
<ion-content padding>
<ion-row>
<!-- optional logo -->
</ion-row>
<div showWhen="core">
<form>
...
</form>
</div>
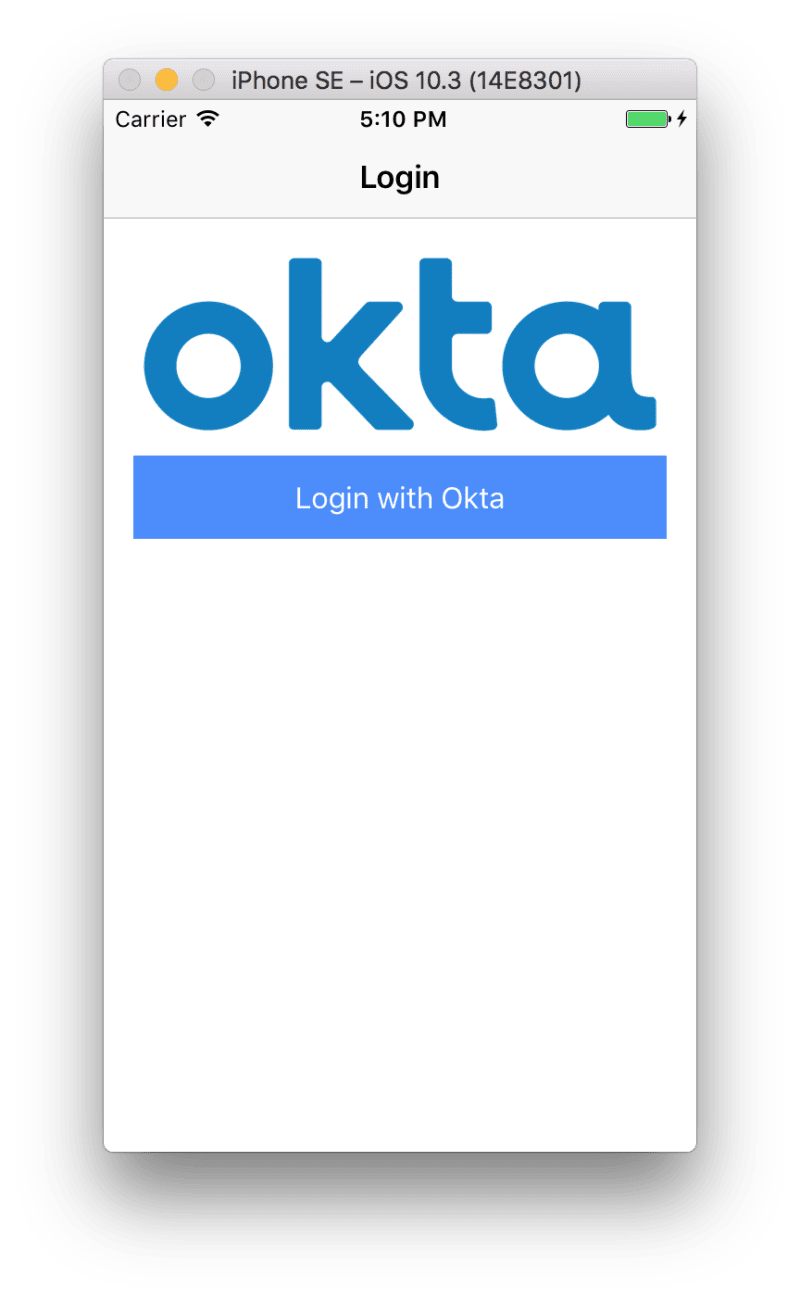
<div hideWhen="core">
<button ion-button full (click)="redirectLogin()">Login with Okta</button>
</div>
</ion-content>
Open src/pages/login/login.ts and add a reference to window just below the imports.
declare const window: any;
Then add the methods below to facilitate logging in with OAuth.
redirectLogin() {
  this.oktaLogin().then(success => {
    const idToken = success.id_token;
    const accessToken = success.access_token;
    const keyValuePair = `#id_token=${encodeURIComponent(idToken)}&access_token=${encodeURIComponent(accessToken)}`;
    this.oauthService.tryLogin({
      customHashFragment: keyValuePair,
      disableOAuth2StateCheck: true
    });
    this.navCtrl.push(TabsPage);
  }, (error) => {
    this.error = error;
  });
}

oktaLogin(): Promise<any> {
  return this.oauthService.createAndSaveNonce().then(nonce => {
    let state: string = Math.floor(Math.random() * 1000000000).toString();
    if (window.crypto) {
      const array = new Uint32Array(1);
      window.crypto.getRandomValues(array);
      state = array.join().toString();
    }
    return new Promise((resolve, reject) => {
      const oauthUrl = this.buildOAuthUrl(state, nonce);
      const browser = window.cordova.InAppBrowser.open(oauthUrl, '_blank',
        'location=no,clearsessioncache=yes,clearcache=yes');
      browser.addEventListener('loadstart', (event) => {
        if ((event.url).indexOf('http://localhost:8100') === 0) {
          browser.removeEventListener('exit', () => {});
          browser.close();
          const responseParameters = ((event.url).split('#')[1]).split('&');
          const parsedResponse = {};
          for (let i = 0; i < responseParameters.length; i++) {
            parsedResponse[responseParameters[i].split('=')[0]] =
              responseParameters[i].split('=')[1];
          }
          const defaultError = 'Problem authenticating with Okta';
          if (parsedResponse['state'] !== state) {
            reject(defaultError);
          } else if (parsedResponse['access_token'] !== undefined &&
            parsedResponse['access_token'] !== null) {
            resolve(parsedResponse);
          } else {
            reject(defaultError);
          }
        }
      });
      browser.addEventListener('exit', function (event) {
        reject('The Okta sign in flow was canceled');
      });
    });
  });
}

buildOAuthUrl(state, nonce): string {
  return this.oauthService.issuer + '/v1/authorize?' +
      'client_id=' + this.oauthService.clientId + '&' +
      'redirect_uri=' + this.oauthService.redirectUri + '&' +
      'response_type=id_token%20token&' +
      'scope=' + encodeURI(this.oauthService.scope) + '&' +
      'state=' + state + '&nonce=' + nonce;
}
Change the redirectUri that's set in the constructor to hard-code http://localhost:8100. If you skip this step window.location.origin will result in a file:// origin being sent when the app is running on a device. By making it a known URL, we can look for it with the in-app browser on the “loadstart” event.
constructor(private navCtrl: NavController, private oauthService: OAuthService) {
  oauthService.redirectUri = 'http://localhost:8100';
  ...
}
You'll have to re-deploy your app to your phone after making these changes.
ionic cordova emulate ios
Now you should be able to log in by clicking on the “Login with Okta” button and entering valid credentials.


The nice thing about using this technique is the Okta login screen has Remember Me and Forgot Password support, so you don't need to code those yourself.
To deploy the app to an iPhone, start by plugging one into your computer. Then run the following commands to build the app and run it on your device.
ionic cordova run ios
This command will likely fail if you haven't previously set up code signing for your application.
Signing for "MyApp" requires a development team. Select a development team in the project editor.
Code signing is required for product type 'Application' in SDK 'iOS 10.3'
Open your project in Xcode using the command below.
open platforms/ios/MyApp.xcodeproj
Ionic's deployment documentation provides instructions to solve this issue.
Select your phone as the target in Xcode and click the play button to run your app. The first time you do this, Xcode may spin for a while with a "Processing symbol files" message at the top.
Once you've configured your phone, computer, and Apple ID, you should be able to open the app and log in. Below is how it looks on my iPhone.


Android
To emulate or deploy to an Android device, you'll first need to install Android Studio. As part of the install, it will show you where it installed the Android SDK. Set this path as an ANDROID_HOME environment variable. On a Mac, it should be ~/Library/Android/sdk/.
If you've just installed Android Studio, make sure to open it to complete the installation.
To deploy to the Android emulator, run ionic cordova emulate android. This command will install Android support and display an error if you don’t have any AVD (Android Virtual Device) images.
(node:9300) UnhandledPromiseRejectionWarning: CordovaError: No emulator images (avds) found.
1. Download desired System Image by running: /Users/mraible/Library/Android/sdk/tools/android sdk
2. Create an AVD by running: /Users/mraible/Library/Android/sdk/tools/android avd
HINT: For a faster emulator, use an Intel System Image and install the HAXM device driver
To create a new AVD, open Android Studio and navigate to Tools > Android > AVD Manager. Create a new Virtual Device and click Play. I chose a Pixel 2.
After performing these steps, you should be able to run ionic cordova emulate android and see your app running in the AVD.


NOTE: If you get an application error that says "The connection to the server was unsuccessful. (file:///android/www/index.html)", add the following line to config.xml. This line sets the default timeout to 60 seconds (default is 20). Thanks to the Stack Overflow community for this solution.
<preference name="loadUrlTimeoutValue" value="60000"/>
PWAs with Ionic
Ionic ships with support for creating progressive web apps (PWAs). This means you can deploy your Ionic app as a web app (rather than a mobile app) and make it run offline in browsers that support service workers.
You can see how to enable service workers and make your app into a PWA by reading the PWAs section of how to develop a mobile app with Ionic and Spring Boot. A PWA is a web application that can be “installed” on your system. It works offline when you don't have an internet connection, leveraging data cached during your last interactions with the app. Adding PWA features can make your apps load a lot faster, creating happy users. To learn more about PWAs, see The Ultimate Guide to Progressive Web Applications.
Ionic has invested heavily in supporting PWAs. You can read more about why in
What Progressive Web Apps can do for you.
Learn More
I hope you've enjoyed this tour of Ionic, Angular, and Okta. I like how Ionic takes your web development skills up a notch and allows you to create mobile applications that look and behave natively and perform swiftly.
You can see the complete source code for this project on GitHub. Please contact me on Twitter @mraible or on Okta's Developer Forums if you have any questions.
To learn more about Ionic, Angular, or Okta, please see the following resources:


Top comments (0)