Okay, this is our description for Cordova to find the developed modules. The official Cordova docs have a detailed documentation about the plugin.xml options.
Create the js bridge to the native module.
We will have two functions towards the native calls:
- Start (starts the accelerometer and fetches data)
- Stop (unregister the accelerometer to prevent draining the battery)
The exec function Cordova provides is used to send data to the native part of the plugin. It has a couple of parameters:
- success callback
- error callback
- class name, which we want to call
- action name
- action parameters
Since Cordova can only give back one result value for one function call, we need to use a setInterval function to ping the native code time by time.
var DeviceSensorLoader = function(require, exports, module) {
  var exec = require('cordova/exec');

  var intervalId;

  function DeviceSensor() {}

  DeviceSensor.prototype.start = function(success, failure, timeOffset) {
    // register the accelerometer listener
    exec(success, failure, 'AndroidSensorManager', 'start', []);
    intervalId = setInterval(function() {
      // get the latest value from the accelerometer
      exec(success, failure, 'AndroidSensorManager', 'getCurrent', []);
    }, timeOffset || 500);
  };

  DeviceSensor.prototype.stop = function(success, failure) {
    if (intervalId) {
      clearInterval(intervalId);
      intervalId = null;
    }
    // unregister the accelerometer event listener
    exec(success, failure, 'AndroidSensorManager', 'stop', []);
  };

  var deviceSensor = new DeviceSensor();
  module.exports = deviceSensor;
};

DeviceSensorLoader(require, exports, module);

cordova.define("cordova/plugin/DeviceSensor", DeviceSensorLoader);
This file was made following this wiki page.
As we have seen, we have three actions in the JavaScript bridge towards the native code that need to be handled in the Java file.
The main part of our plugin will be the execute function.
@Override
public boolean execute(String action, JSONArray args, CallbackContext callbackContext) throws JSONException {
    if ("beep".equals(action)) {
        this.beep(args.getLong(0));
        callbackContext.success();
        return true;
    }
    return false;  // Returning false results in a "MethodNotFound" error.
}
If you call an exec function on the JavaScript side, this native function will get the argument you provide.
Our plugin class is a little bit larger, but still not too large. In the following code, I did my best to comment on all the important stuff.
package com.codingsans.ionic.sensormanager;

import org.apache.cordova.CallbackContext;
import org.apache.cordova.CordovaInterface;
import org.apache.cordova.CordovaWebView;
import org.apache.cordova.CordovaPlugin;
import org.apache.cordova.PluginResult;

import org.json.JSONArray;
import org.json.JSONObject;
import org.json.JSONException;

import android.content.Context;
import android.hardware.SensorManager;
import android.hardware.SensorEventListener;
import android.hardware.SensorEvent;
import android.hardware.Sensor;

// this is our Cordova plugin, we need to extend it from the CordovaPlugin class
public class AndroidSensorManager extends CordovaPlugin {
    // a bunch of globals
    private SensorManager mSensorManager;
    private Sensor accelerometer;
    private CallbackContext callbackContext;
    private JSONObject data = new JSONObject();

    // at the initialize function, we can configure the tools we want to use later, like the sensors
    @Override
    public void initialize(CordovaInterface cordova, CordovaWebView webView) {
        super.initialize(cordova, webView);

        mSensorManager = (SensorManager) cordova.getActivity().getSystemService(Context.SENSOR_SERVICE);
        accelerometer = mSensorManager.getDefaultSensor(Sensor.TYPE_ACCELEROMETER);
    }

    // safety unregistering from the events if the application stops somehow
    @Override
    public void onDestroy() {
        mSensorManager.unregisterListener(listener);
    }

    // this is the main part of the plugin, we have to handle all of the actions sent from the js
    @Override
    public boolean execute(String action, JSONArray args, CallbackContext callbackContext) throws JSONException {
        if ("start".equals(action)) {
	// here we call a start action to register our event listener to watch the data coming from the accelerometer
            mSensorManager.registerListener(listener, accelerometer, SensorManager.SENSOR_DELAY_UI);
        } else if ("stop".equals(action)) {
	// manually stop receiving data.
            mSensorManager.unregisterListener(listener);
        } else if ("getCurrent".equals(action)) {
	// we send back the latest saved data from the event listener to the success callback
            PluginResult result = new PluginResult(PluginResult.Status.OK, this.data);
            callbackContext.sendPluginResult(result);
            return true;
        }
        return false;  // Returning false results in a "MethodNotFound" error.
    }

    // this is our event listener which will handle the received data and save it to a global variable
    private SensorEventListener listener = new SensorEventListener() {
        public void onSensorChanged(SensorEvent event) {
          if (event.sensor.getType() == Sensor.TYPE_ACCELEROMETER) {
              data = new JSONObject();
              try {
                  data.put("x", event.values[0]);
                  data.put("y", event.values[1]);
                  data.put("z", event.values[2]);
              } catch(JSONException e) {}
          }
        }

        public void onAccuracyChanged(Sensor sensor, int accuracy) {
            // unused
        }
    };
}
THE DEMO APPLICATION
This blogpost is not an Ionic 3 and Angular 4 tutorial, so this part won’t be very detailed.
Let’s see how the plugin works in a demo application.
Step 1:
If you don’t have Ionic and Cordova, you should install them first:
npm i -g cordova ionic
Step 2:
To make a new project, you should run the following command:
ionic start ionic-android-sensor-plugin blank
The ionic-android-sensor-plugin will be the name of the project, and the blank will be the starter template.
Step 3:
Jump into the created folder
cd ionic-android-sensor-plugin
Add Android platform to the project; this will take a couple of seconds
ionic cordova platform add android
You can try the initialized project on your device
ionic cordova run android
It seems to be working. :)
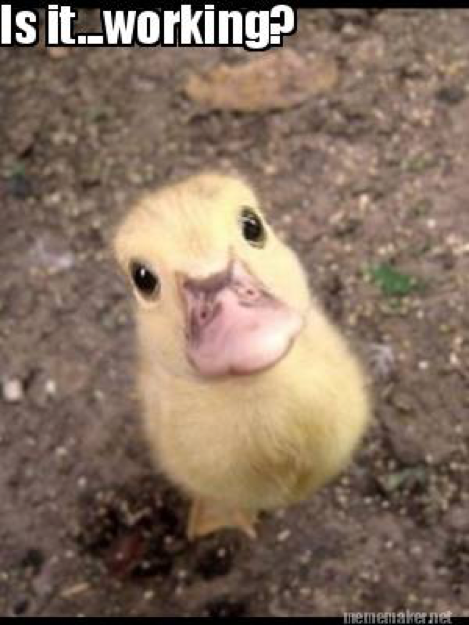
Source: mememaker.net
Now we want to reach the sensor data from the native provider. To use the plugin in this demo app, we should install it first from GitHub (you should use the HTTPS url style not the SSH).
There is no difference between developing an Ionic application or just a plain Cordova app; the plugin installation process is nearly the same. The only difference is the start of the command:
cordova plugin add… (at cordova application)ionic plugin add… (at Ionic v1 and v2)ionic cordova plugin add… (at Ionic v3)
ionic cordova plugin add https://github.com/Lacka90/ionic-native-sensor-plugin.git
or you can add the plugin from your local folder (I didn’t use this, but it should work :))
ionic cordova plugin add /path/to/my/plugin/my.plugin.folder.here/
Hint: If you install a plugin, the plugin’s files will be copied to the application. So, if you modify the plugin’s code, you should remove it and add it again. The name that you use to remove one plugin ( here - Cordova-plugin-sensor-manager ) is coming from the plugin.xml plugin tag ID attribute.
ionic cordova plugin remove cordova-plugin-sensor-manager
ionic cordova plugin add https://github.com/Lacka90/ionic-native-sensor plugin.git
Let’s build the Ionic part of the app:
Move to the src/pages/home/ folder
Modify the home.html like this
<ion-header>
  <ion-navbar>
    <ion-title>
      Ionic Blank
    </ion-title>
  </ion-navbar>
</ion-header>

<ion-content id="canvas">
  <ion-row style="border-bottom: 1px #488aff solid">
      <ion-col col-6>
          <button ion-button block (click)="start()">START</button>
      </ion-col>
      <ion-col col-6>
          <button ion-button block (click)="stop()">STOP</button>
      </ion-col>
  </ion-row>
  <div class="ball" [hidden]="!visible" [ngStyle]="{ 'top': top + 'px', 'left': left + 'px', 'width': ballD + 'px', 'height': ballD + 'px' }"></div>
</ion-content>
There will be two buttons for start and stop receiving the accelerometer data and a ball classed div, which will move on the screen according to the device position.
There are two functions (start, stop) and four variables (hidden, top, left, ballD) which need to be created and implemented.
Continue with the home.scss file. This is very straightforward; only use this to make the ball moveable in the DOM.
page-home {
  .ball {
    position: absolute;
    display: block;
    border-radius: 50%;
    background-color: white;
    border: 5px solid black;
  }
}
And the final part is the home.ts file. All the logic sits here.
import { Component, AfterViewInit, OnDestroy, NgZone, ViewChild } from '@angular/core';
import { NavController } from 'ionic-angular';

// the button container height used for calculation because we don’t want to move the ball
// element on the top of the buttons.
const TOP_BAR_HEIGHT = 54;

@Component({
  selector: 'page-home',
  templateUrl: 'home.html'
})
export class HomePage implements AfterViewInit, OnDestroy {
  ballD = 30;
  top = 0;
  left = 0;
  visible = false;

  canvasWidth = 0;
  canvasHeight = 0;

  constructor(public navCtrl: NavController, private zone: NgZone) {}

  ngAfterViewInit() {
    // after the DOM rendered we are able to get the area dimensions
    // where our ball can move later. When it’s done, the ball will be visible.
    const canvas = document.getElementById('canvas');
    this.canvasWidth = canvas.offsetWidth;
    this.canvasHeight = canvas.offsetHeight;
    this.top = (this.canvasHeight - this.ballD) / 2;
    this.left = (this.canvasWidth - this.ballD) / 2;
    this.visible = true;
  }

  start() {
    // Usage of the cordova plugin. We are calling the start method which we
    // can reach from the defined js bridge window.cordova.plugins.sensorManger.
    // using a bracket syntax just because I didn’t make any TS interface from the module
    window['cordova']['plugins']['sensorManager']['start'](
      // the first callback is the success callback. We got back the native code’s result here.
      (result) => {
        this.zone.run(() => {
          // these calculations only used for the ball to prevent it moving out from the screen
          let left = this.left - result.x * 15;
          if (left < 0) {
            left = 0;
          }
          if (left > this.canvasWidth - this.ballD) {
            left = this.canvasWidth - this.ballD;
          }
          let top = this.top + result.y * 15;
          if (top < TOP_BAR_HEIGHT) {
            top = TOP_BAR_HEIGHT;
          }
          if (top > this.canvasHeight - this.ballD) {
            top = this.canvasHeight - this.ballD;
          }
          this.left = left;
          this.top = top;
        });
      },
      // the second is the error callback where we get back the errors
      (err) => {
        console.log(err);
      },
      // the third parameter is the interval time when we are fetching the sensor
      100
    );
  }

  stop() {
    // this native call doesn’t have any arguments, just send an action to the native part to
    // stop listening to sensor data
    window['cordova']['plugins']['sensorManager']['stop']();
  }

  ngOnDestroy() {
    this.stop();
  }
}
I think this post covered every main part of Cordova Android plugin development.
I couldn’t cover everything in this post, so if you want to dig into the details, you can learn from the official docs.
Here are the 2 repositories I made when I wrote this blogpost:
I hope this post can help you start your own plugin and cross-platform applications development with native features.
READY TO UPGRADE?

_ We’re a full-stack web development agency, building web applications from design to delivery with Angular, React, and Node.js