React Native from Facebook is an addition to the popular React JavaScript library for creating Native Mobile Apps. It has proved more popular, performant and feature packed than other frameworks, but there are times when its feature set falls short. For these times, React Native has an excellent way of creating your own modules for accessing a Native API not yet supported. In this tutorial I will show you how to create React Native Modules that exposes the Android MediaPlayer api to react Native.
You can find the full code for the project on GitHub.
Getting Started with React Native
SitePoint has a full guide for installing React Native available here. Once it’s installed, create a new project with the following command:
react-native init ReactNativeModuleTutorial
This will create a new folder named ReactNativeModuleTutorial in your current working directory. Navigate to the folder and run the new project on your device or emulator using the following command.
Note: If you are using an Android emulator then you have to start the emulator before running the command.
react-native run-android
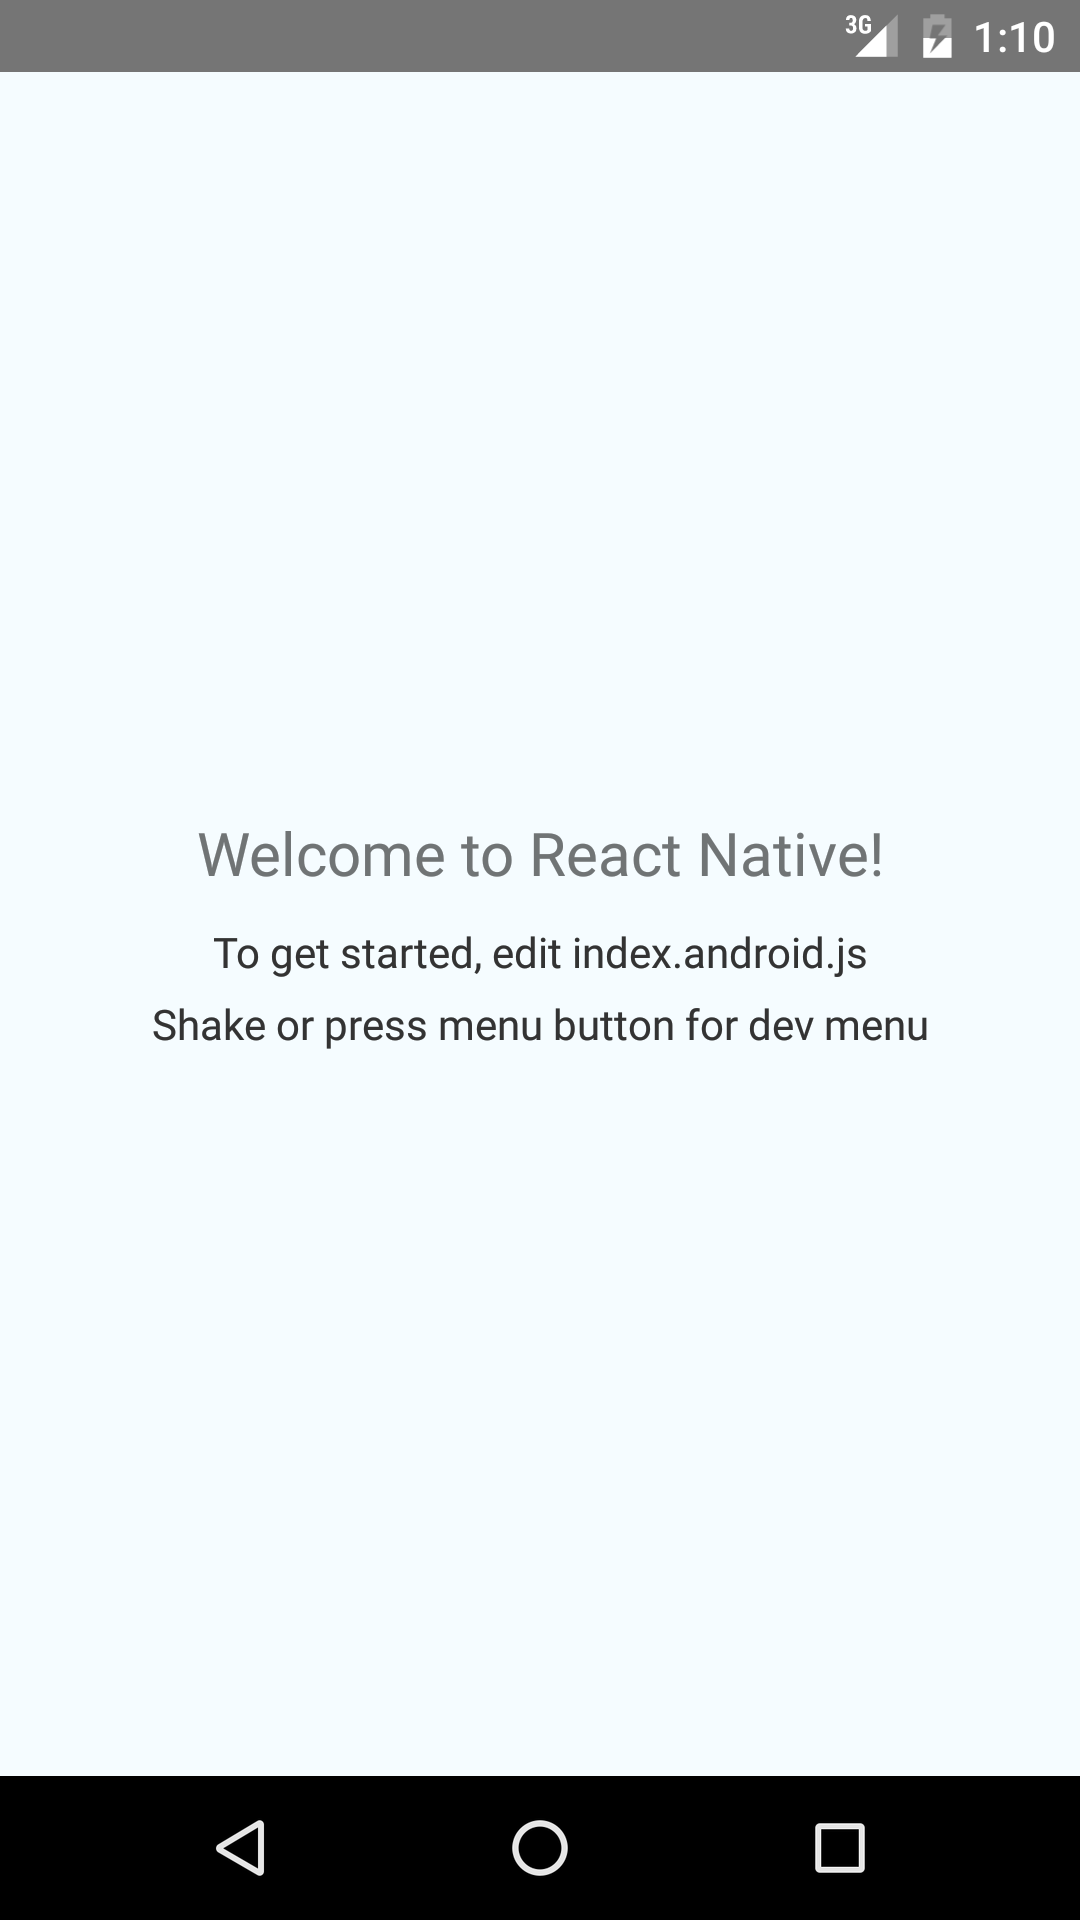
This will create all the necessary files and folders in the project and you should see the following screen on your emulator.
Creating a React Native Android Native Module
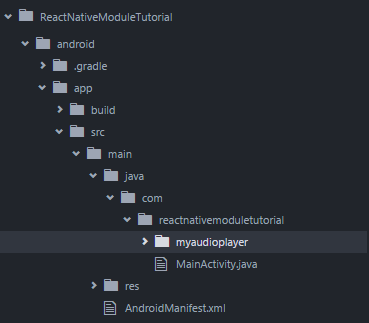
Now that you have set the project up, it’s time to create a React Native module. Create a new folder named myaudiomodule in the following directory:
ReactNativeModuleTutorial/android/app/src/main/java/com/reactnativemoduletutorial
To create a simple native module you need to at least two files.
- React Package class
- A java class that extends
ReactContextBaseJavaModule
The React Package file takes care of packaging different modules together in one file to used later in JavaScript code. Create a file named MyAudioPlayerPackage.java inside the myaudioplayer folder. You don’t have to pay much attention to this file as the important part is to add the module (that you will create shortly) to the package inside the createNativeModules method. If you decide to create multiple module files then you will need to add those here as well.
Add the following to MyAudioPlayerPackage.java:
package com.reactnativemoduletutorial.myaudioplayer;

import com.facebook.react.ReactPackage;
import com.facebook.react.bridge.JavaScriptModule;
import com.facebook.react.bridge.NativeModule;
import com.facebook.react.bridge.ReactApplicationContext;
import com.facebook.react.uimanager.ViewManager;

import java.util.ArrayList;
import java.util.Collections;
import java.util.List;

public class MyAudioPlayerPackage implements ReactPackage {
    @Override
    public List<NativeModule> createNativeModules(ReactApplicationContext reactContext) {
        List<NativeModule> modules = new ArrayList<>();
        modules.add(new MyAudioPlayerModule(reactContext)); // adding the module to package
        return modules;
    }
    @Override
    public List<Class<? extends JavaScriptModule>> createJSModules() {
        return Collections.emptyList();
    }
    @Override
    public List<ViewManager> createViewManagers(ReactApplicationContext reactContext) {
        return Collections.emptyList();
    }
}
It’s time to move on to the exciting part of writing the module that you will use later in the JavaScript code. Create another file in the same folder named MyAudioPlayerModule.java. In this file you will implement all the logic of the module and to access the Android API’s that are not yet available in React Native.
package com.reactnativemoduletutorial.myaudioplayer;

import com.facebook.react.bridge.ReactContextBaseJavaModule;
import com.facebook.react.bridge.ReactApplicationContext;
import com.facebook.react.bridge.ReactMethod;
import com.facebook.react.bridge.Callback;
import java.util.Map;

// these classes are required for playing the audio
import android.media.MediaPlayer;
import android.media.AudioManager;

public class MyAudioPlayerModule extends ReactContextBaseJavaModule {

  private static MediaPlayer mediaPlayer = null;

  public MyAudioPlayerModule(ReactApplicationContext reactContext) {
    super(reactContext);
  }

   @Override
   public String getName() {
     return "MyAudioPlayer";
   }

}
The package is com.reactnativemoduletutorial.myaudioplayer since you are inside the myaudioplayer folder. You can also create these files anywhere inside the reactnativemoduletutorial folder if you change the package accordingly.
The code first imports all the classes needed to create the functionality the module needs. Every module class extends ReactContextBaseJavaModule and ReactContextBaseJavaModule requires the getName method. The method allows you to set a name for the module used inside the JavaScript code to access the module.
@Override
public String getName() {
  return "MyAudioPlayer";
}
The methods annotated with @ReactMethod will be accessible in the JavaScript code and these bridge methods are always of return type void. You must declare every method you want to use in the JavaScript code this way.
I have created a couple of methods for playing the audio file in the module but the implementation of the audio player is up to you, feel free to write your own code for the player.
@ReactMethod
public void preparePlayer(String url) {
  try{
    if (mediaPlayer != null) {
      mediaPlayer.release();
      mediaPlayer = null;
    }
    mediaPlayer = new MediaPlayer();
    mediaPlayer.setAudioStreamType(AudioManager.STREAM_MUSIC);
    mediaPlayer.setDataSource(url);
    mediaPlayer.setLooping(true);
    mediaPlayer.prepareAsync();
  }catch(Exception e){  }
}

@ReactMethod
public void play() {
  try{
    if (mediaPlayer != null) {
      if (!mediaPlayer.isPlaying()) {
        mediaPlayer.start();
      }
    }
  }catch(Exception e){}
}

@ReactMethod
public void pause(){
  try{
    if (mediaPlayer != null) {
      if (mediaPlayer.isPlaying()) {
        mediaPlayer.pause();
      }
    }
  }catch(Exception e){}
}
The code is reasonably self-explanatory with methods for setting up the audio player, playing and pausing using the MediaPlayer class available in Android.
The vital part of writing a native module is creating methods that accept callback methods invoked after certain tasks. This is how you can pass values from Java to JavaScript.
Create a new method called setOnPreparedCallback which will take a callback method as an argument and will fire this callback when the audio file is ready to play.
@ReactMethod
public void setOnPreparedCallback(Callback onPrepared){
  final Callback onPreparedCallback = onPrepared;
  try{
    mediaPlayer.setOnPreparedListener(new MediaPlayer.OnPreparedListener() {
      @Override
      public void onPrepared(MediaPlayer player) {
        try{
          onPreparedCallback.invoke(mediaPlayer.getDuration()); // invoking the callback with duration as argument
        }catch(Exception e){}
      }
    });
  }catch(Exception e){}
}
The last step is to tell React Native about the package. Edit MainApplication.java in ReactNativeModuleTutorial/android/app/src/main/java/com/reactnativemoduletutorial/ to import MyAudioPlayerPackage.java from the myaudioplayer folder.
import com.reactnativemoduletutorial.myaudioplayer.MyAudioPlayerPackage;
Update the getPackages method to the following:
return Arrays.<ReactPackage>asList(
    new MainReactPackage()
    new MyAudioPlayerPackage() // the line added
);
Now you can use the module in the React Native application. Open index.android.js in the root of the project and paste the following code in, replacing anything that is already there. I have designed a simple application that has play and pause buttons with 3 indicators of the current state of the application.
import React, { Component } from 'react';
import {
  AppRegistry,
  StyleSheet,
  Text,
  ToastAndroid,
  View,
  NativeModules,
  TouchableHighlight
} from 'react-native';

var MyAudioPlayer  = NativeModules.MyAudioPlayer;

var buttonStyles = { marginTop: 8, backgroundColor: '#dddddd', padding: 10 };
var statStyle = { flex: 0.5, backgroundColor: '#cccccc', padding: 8, borderColor: '#ffffff', borderWidth: 1, margin: 2 };

class ReactNativeModuleTutorial extends Component {
  constructor(props){
    super(props);
    this.state = {
      mp3Url: 'http://www.example.com/audio.mp3',
      prepared: false,
      playing: false,
      duration: 0
    };
  }
  componentDidMount(){
    MyAudioPlayer.preparePlayer(this.state.mp3Url);
    MyAudioPlayer.setOnPreparedCallback((duration) => {
      this.setState({ prepared: true, duration: duration });
      ToastAndroid.show('Audio prepared', ToastAndroid.LONG);
    });
  }
  playSound(){
    if (this.state.prepared === true) {
      this.setState({ playing: true });
      MyAudioPlayer.play();
      return true;
    }
    return false;
  }
  pauseSound(){
    if (this.state.prepared === true && this.state.playing === true) {
      MyAudioPlayer.pause();
      this.setState({ playing: false })
      return true;
    }
    return false;
  }
  render() {
    return (
      <View style={{ flex:1, alignItems: 'stretch', backgroundColor: '#F5FCFF' }}>
        <View style={{ padding: 10, backgroundColor: '#939cb0' }}>
          <Text style={{ color: '#ffffff', textAlign: 'center', fontSize: 24 }}>Audio Player</Text>
        </View>
        <View style={{ alignItems: 'flex-start', flexDirection: 'row', marginTop: 8 }}>
          <View style={statStyle}><Text style={{ textAlign: 'center' }}>Prepared : {(this.state.prepared) ? 'Yes' : 'No'}</Text></View>
          <View style={statStyle}><Text style={{ textAlign: 'center' }}>Playing : {(this.state.playing) ? 'Yes' : 'No'}</Text></View>
          <View style={statStyle}><Text style={{ textAlign: 'center' }}>Duration : {this.state.duration}</Text></View>
        </View>
        <View style={{ padding: 5 }}>
          <TouchableHighlight
            style={buttonStyles}
            onPress={this.playSound.bind(this)}>
            <Text style={{ textAlign: 'center' }}>Play</Text>
          </TouchableHighlight>
          <TouchableHighlight
            style={buttonStyles}
            onPress={this.pauseSound.bind(this)}>
            <Text style={{ textAlign: 'center' }}>Pause</Text>
          </TouchableHighlight>
        </View>
      </View>
    );
  }
}

AppRegistry.registerComponent('ReactNativeModuleTutorial', () => ReactNativeModuleTutorial);

First import the NativeModules component, as it contains the module that just created and any other native modules.
You accessed the module using the following code:
var MyAudioPlayer = NativeModules.MyAudioPlayer;
Now all the methods defined in the module are available. Look at the componentDidMount method, where you prepare the player first using MyAudioPlayer.preparePlayer method and then set the callback method for OnPreparedListener.
componentDidMount(){
  MyAudioPlayer.preparePlayer(this.state.mp3Url);
  MyAudioPlayer.setOnPreparedCallback((duration) => {
    this.setState({ prepared: true, duration: duration });
    ToastAndroid.show('Audio prepared', ToastAndroid.LONG);
  });
}
A Cross-Platform Native Bridge
By creating your own React Native modules you have the possibility to bridge native Android (and iOS) functionality to a cross-platform codebase. You need to understand coding for your native codebase of choice, but by doing so help React Native developers access new functionality and possibilities.
Have you ever created your own React Native module? What did you make and how did you find the process?
Frequently Asked Questions (FAQs) about Accessing Platform APIs with React Native Modules
How can I access platform-specific APIs using React Native modules?
React Native modules provide a bridge between JavaScript running in your application and native code running on the host platform. To access platform-specific APIs, you need to create a native module that exposes these APIs to your JavaScript code. This involves writing native code in the language appropriate for the platform (Java for Android, Objective-C or Swift for iOS), and then invoking methods on this native code from your JavaScript.
What are the differences between React Native modules and components?
React Native modules and components serve different purposes. Components are the building blocks of your user interface, and they render some UI that users can interact with. Modules, on the other hand, provide a way for JavaScript to communicate with native code, and they do not have a visual representation.
How can I write platform-specific code in React Native?
React Native provides several ways to write platform-specific code. One way is to use the Platform module, which has a Platform.OS property that returns the platform the code is running on. Another way is to use platform-specific file extensions (.android.js or .ios.js), and React Native will automatically pick the right file based on the platform.
Can I use native modules to access all platform APIs?
Not all platform APIs are accessible through native modules. Some APIs may not be exposed by the platform, or they may require special permissions or capabilities that are not available to the application. However, most common platform APIs can be accessed through native modules.
How can I handle platform-specific UI differences in React Native?
React Native provides several ways to handle platform-specific UI differences. One way is to use the Platform module, which has a Platform.select method that takes a map with keys of platform names and values of platform-specific code. Another way is to use platform-specific file extensions, and React Native will automatically pick the right file based on the platform.
How can I test my native modules?
Testing native modules can be a bit more complex than testing JavaScript code, as it involves both JavaScript and native code. One approach is to write unit tests for your native code using the testing tools provided by the platform (JUnit for Android, XCTest for iOS), and then write separate tests for your JavaScript code using a JavaScript testing framework like Jest.
Can I use native modules with Expo?
Expo, a set of tools and services for React Native, does not support native modules out of the box. However, you can eject your Expo project to a bare React Native project, which allows you to use native modules.
How can I debug native modules?
Debugging native modules involves both JavaScript and native code, and it can be done using a combination of JavaScript debugging tools (like Chrome Developer Tools or React Native Debugger) and native debugging tools (like Android Studio or Xcode).
Can I use third-party native modules?
Yes, you can use third-party native modules in your React Native application. However, you should be aware that using third-party native modules can increase the size of your application and may introduce compatibility issues.
How can I optimize the performance of my native modules?
Optimizing the performance of native modules involves both JavaScript and native code. On the JavaScript side, you can use techniques like memoization or debouncing to reduce the number of calls to native methods. On the native side, you can use platform-specific profiling tools to identify and optimize performance bottlenecks.
 Sajjad Ashraf
Sajjad is based in Lahore, Pakistan and is the founder of InsideCampus a social network for students. He is a React.js and React Native enthusiast and a part time freelancer. I also write about my development endeavors on Web Developer Pal